

Kyle Rankin @kyle@librem.one
- Personal Site
- https://kylerank.in
- Personal Bibliography
- https://kylerank.in/writing.html
Admin
Technical author, FOSS advocate, public speaker, Linux security & infrastructure geek, author of The Best of Hack and /: Linux Admin Crash Course, Linux Hardening in Hostile Networks and many other books, ex-Linux Journal columnist.
Joined Apr 2019
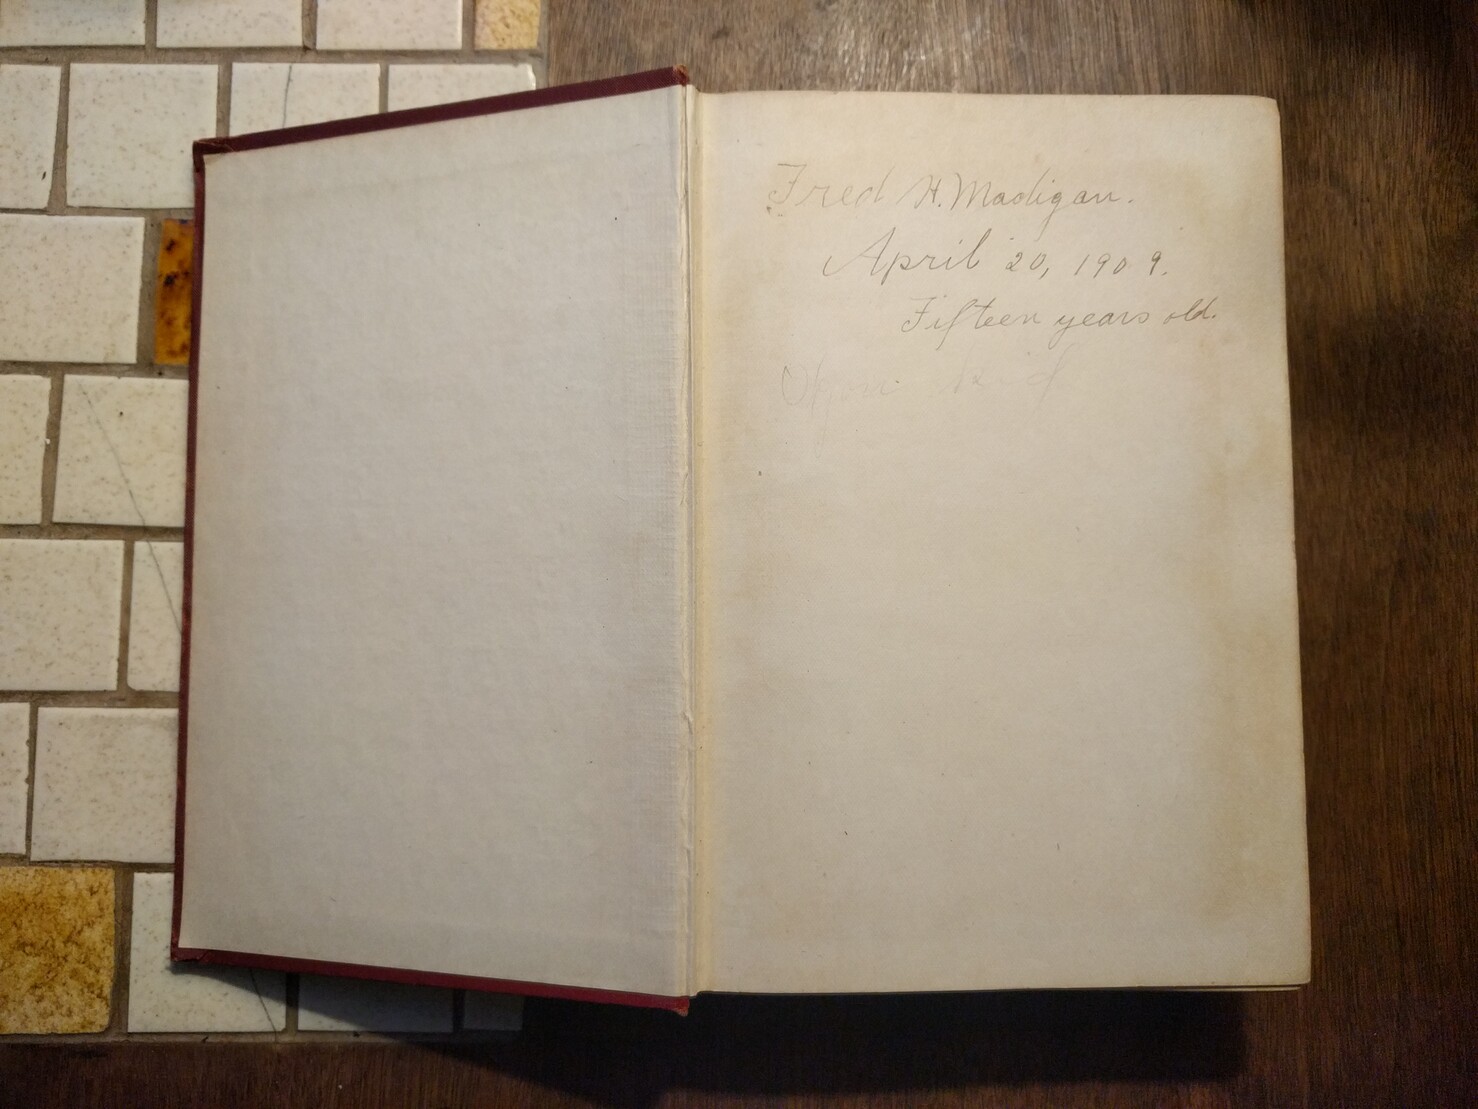
The next book on my reading list is Plutarch's Lives (Dreyden). On the inside cover is this dedication to the 15 year old boy who first received this 1908 four-volume set new in 1909.
I assume the gift was intended to train the young man in moral virtues. My understanding is that this was a somewhat common practice in prior eras. The idea was that young men would learn and emulate the virtues of the Greek and Roman heroes described within, presumably without the vices.
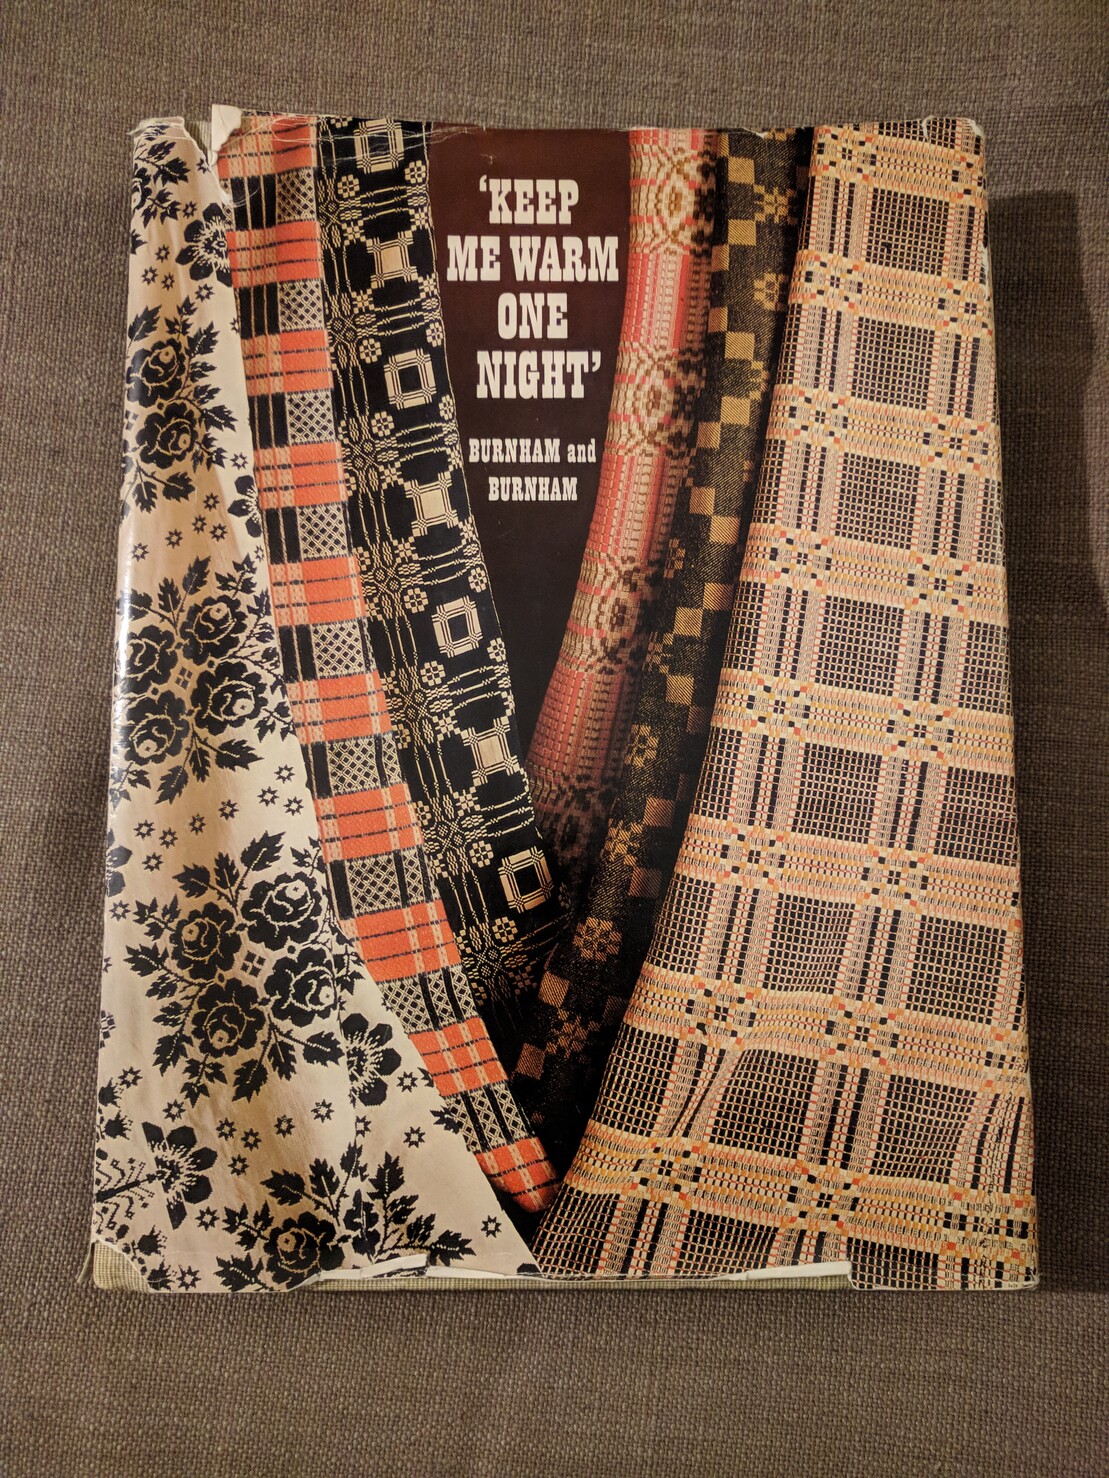
I was reading a book on the history of American coverlets and it referenced (and was clearly inspired by) this book, Keep Me Warm One Night, an exhaustive history of the Canadian coverlet weaving tradition. The book is out of print, and most of the used copies were rather expensive.
I found a copy for a more reasonable price so here it is, part of my weaving library! My mom has hinted she'd like a traditional coverlet, and it will likely be inspired by one from this book.
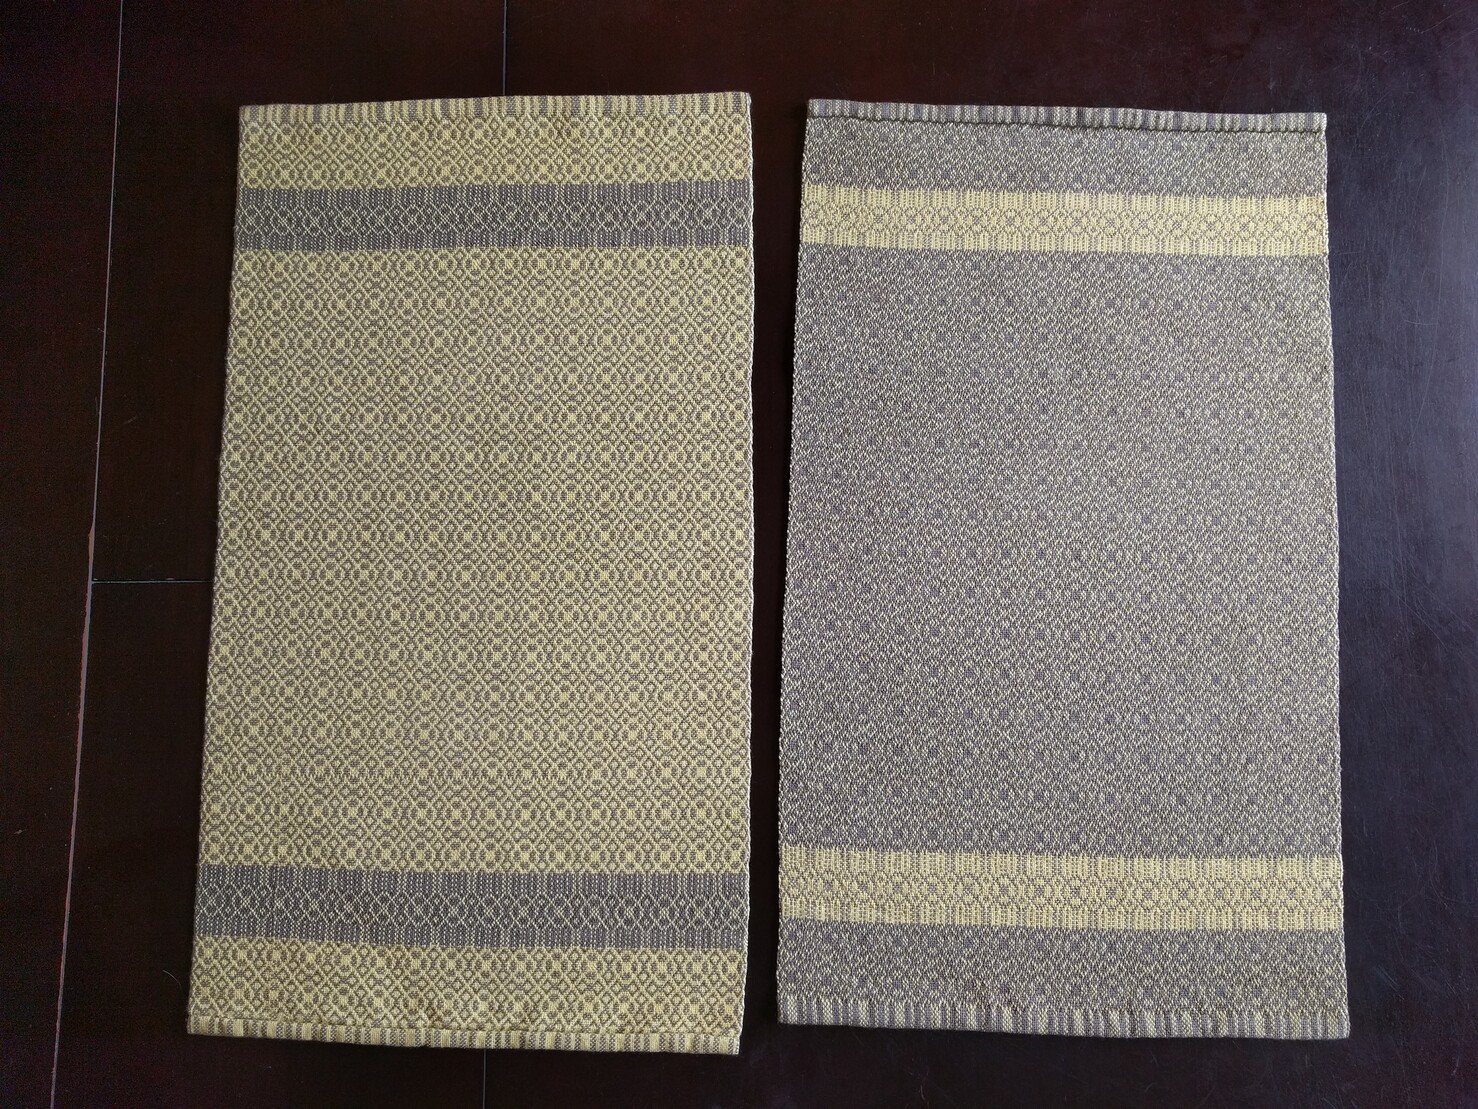
My towels are finished! I handstitched the hems with a felling stitch using matching thread so it would be invisible, and because this is a reversible pattern and has no "right" side, I put one hem on each side of the towel. In this picture you can see what each side looks like. The one on the left (with some treadling mistakes) I will keep and the one on the right will be submitted to a competition.
I thought some of you might find it interesting to see a short video of the knitting clock in action. I'm simulating multiple days here, one complete rotation (day) at a time, with a short pause in between.
This is a lot louder than the final clock will be, because I'm using faster and more powerful double steps for these steps. The actual on-the-hour stitches will use quieter, slower, microsteps.
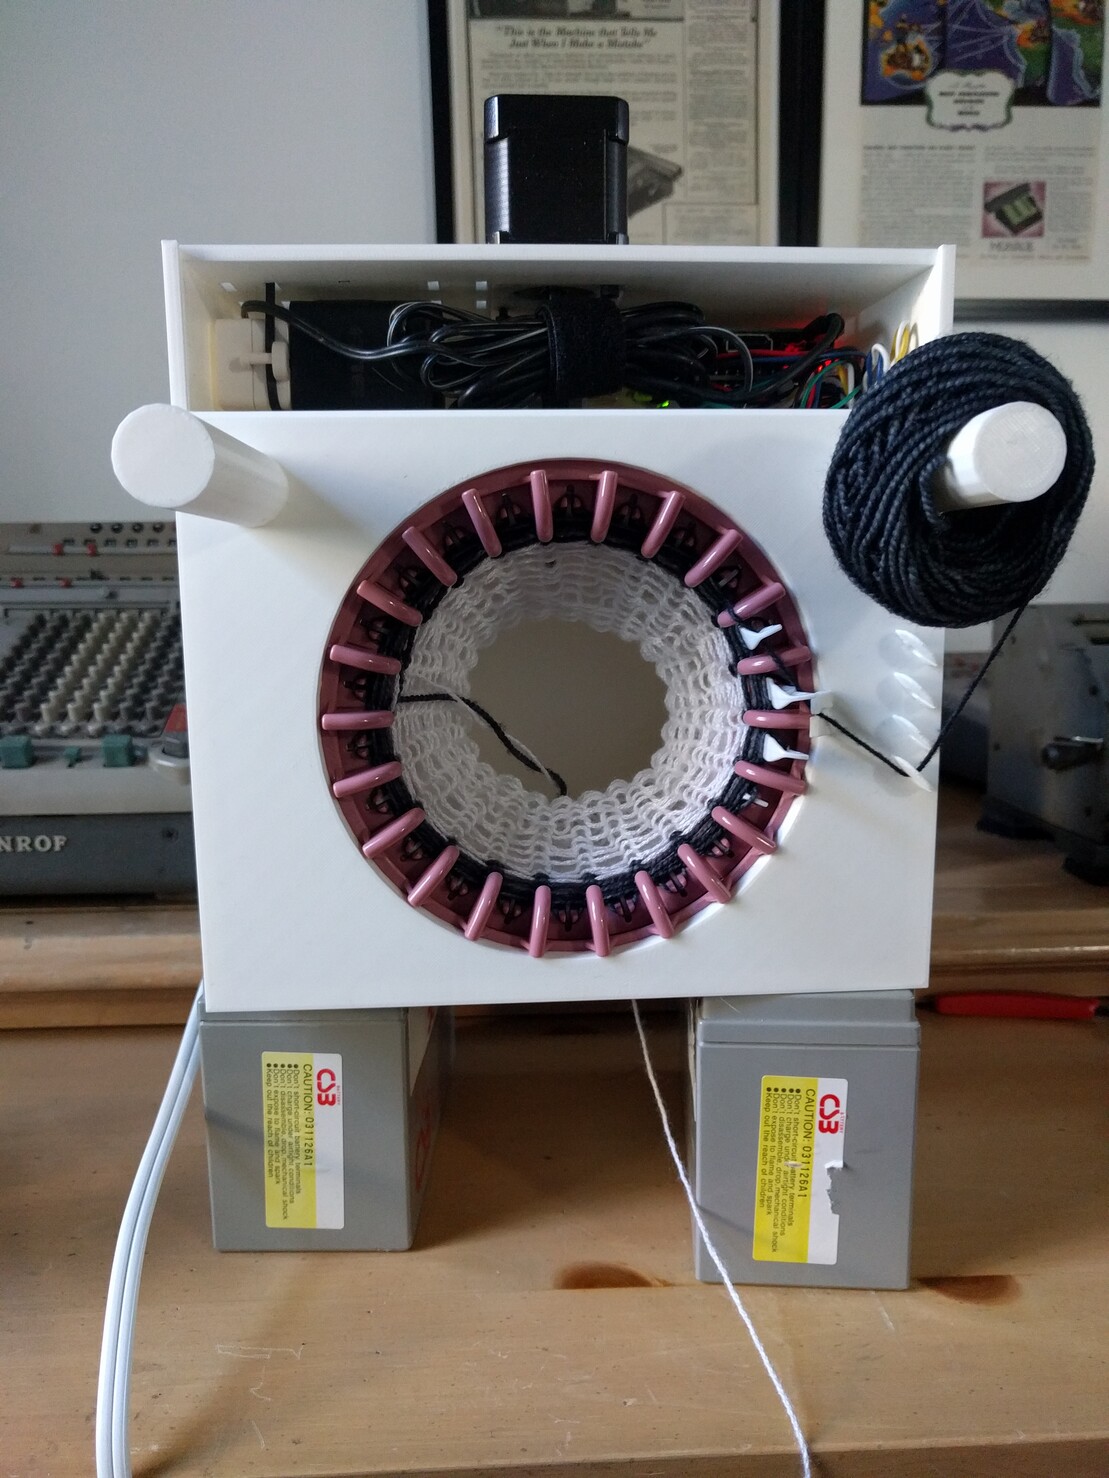
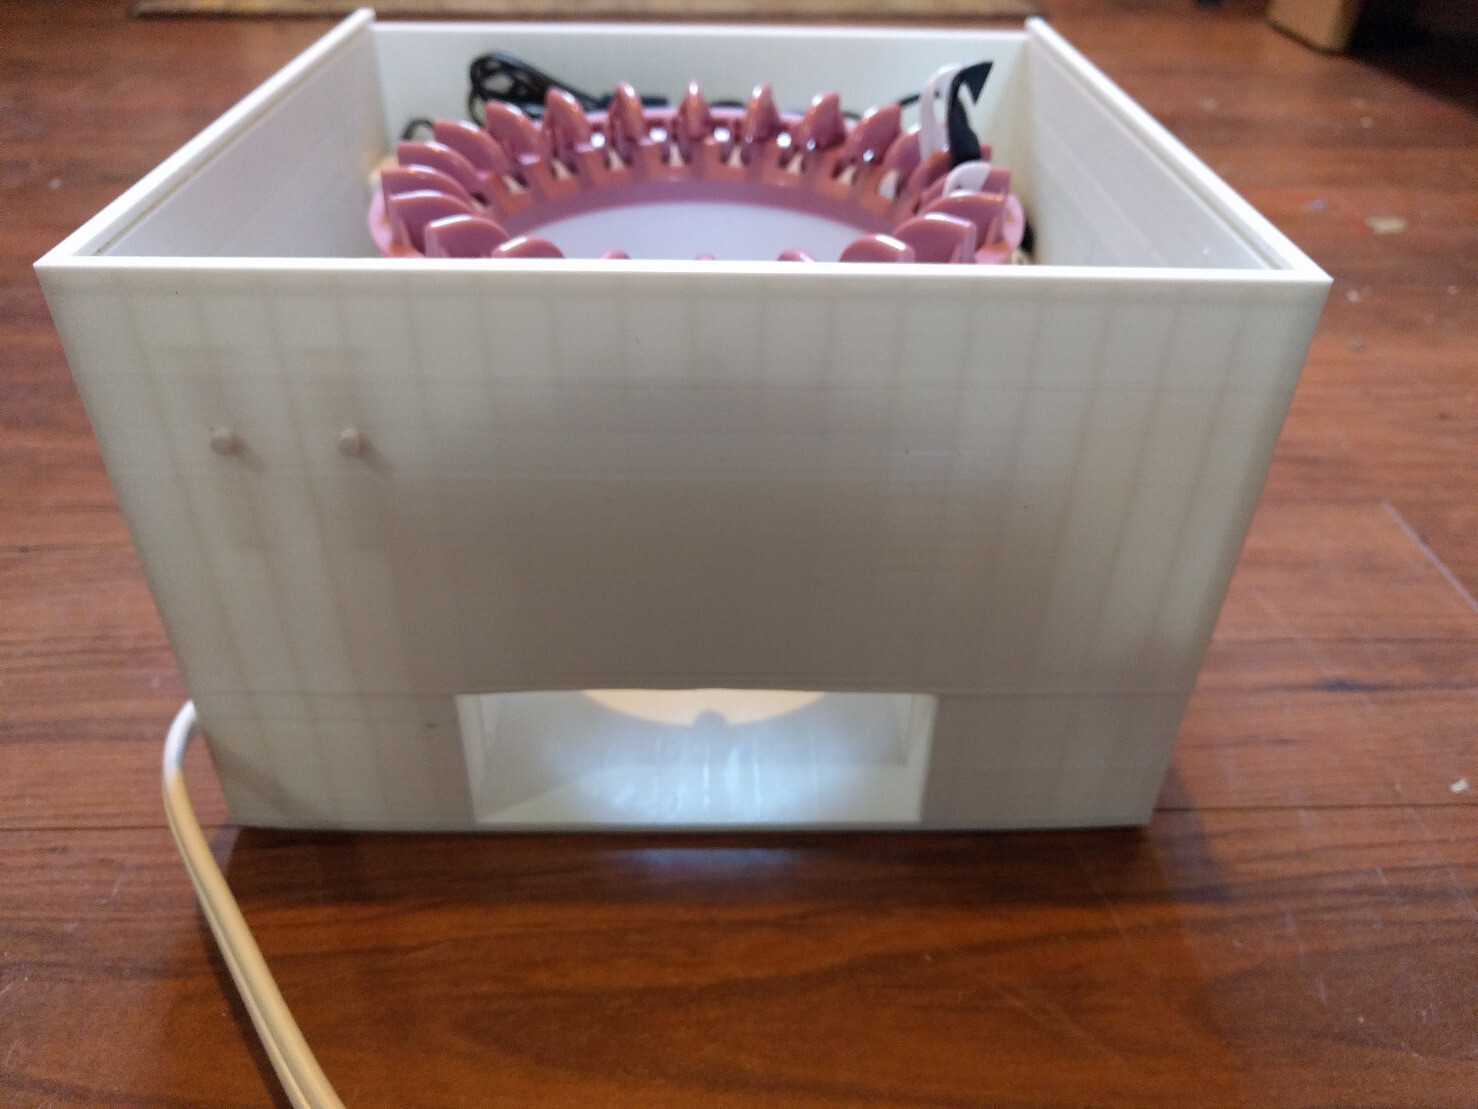
More progress on my knitting clock. I have finished designing and printing the bottom half of the "top" of the case that covers the knitting machine and provides a spool and tensioning guides for the yarn.
Here you can see it after I set up some white waste yarn and then switched to black yarn. I simulated a day or two's worth of knitting and then let it auto-progress a stitch every hour overnight.
Next I will design the "roof" for the clock.
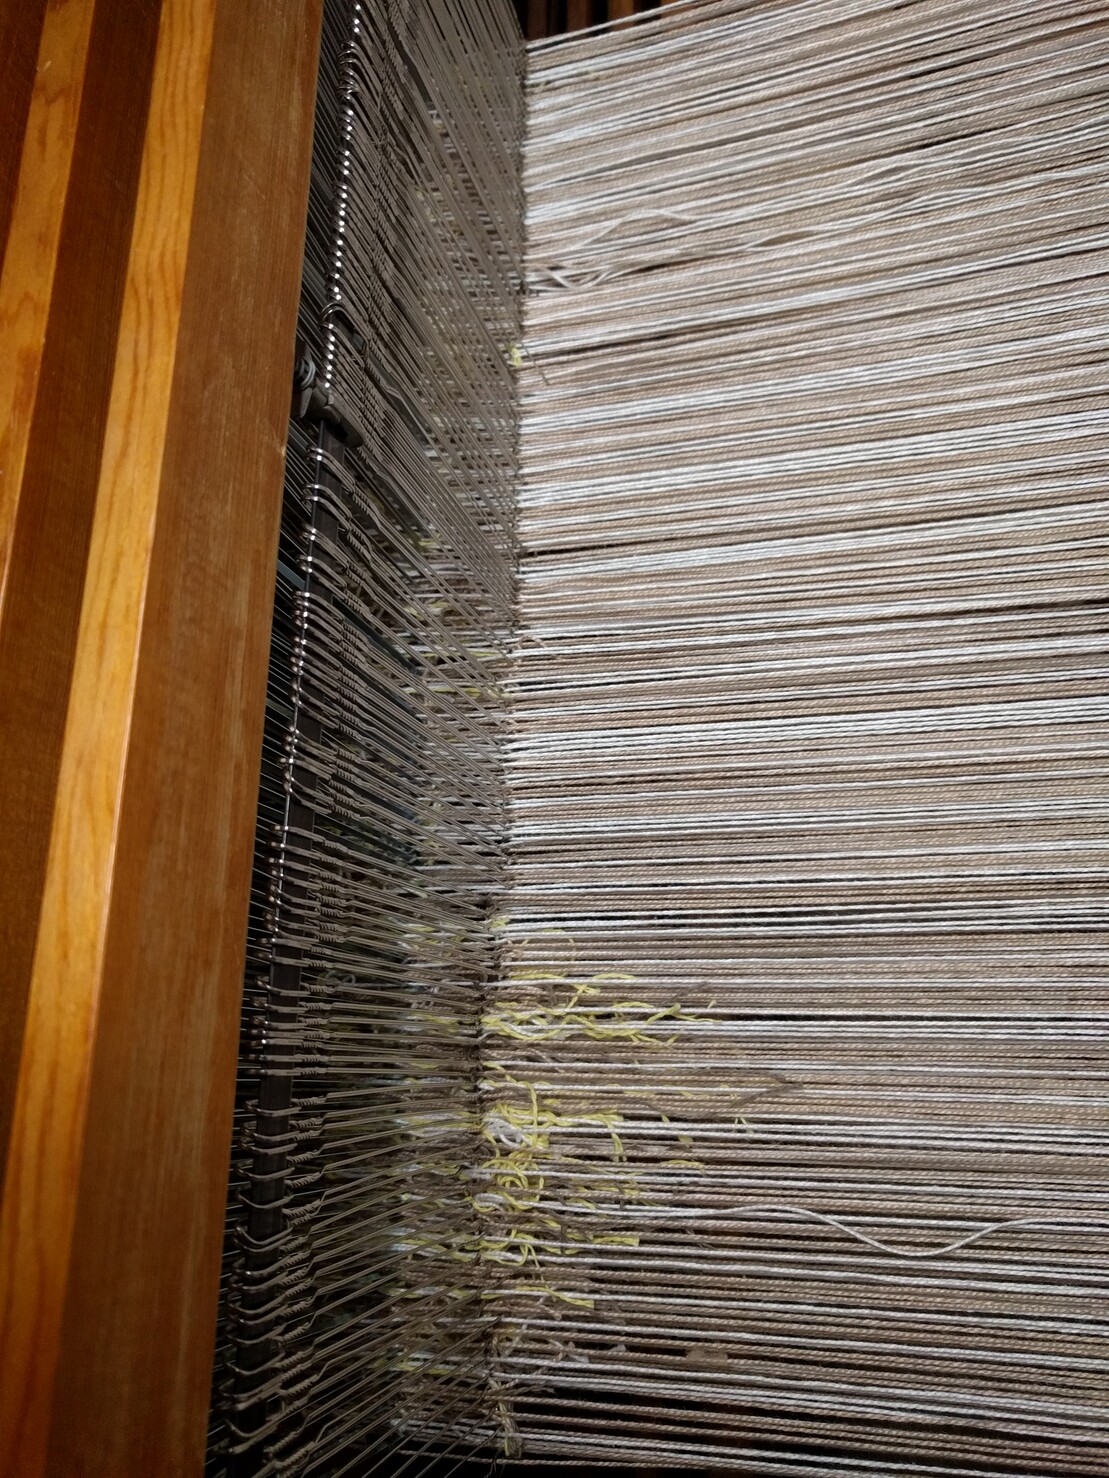
Well I think I'm calling it quits on this towel set early. This is the last in a long series of warp threads that came loose from the weaver's knot that attached it to the previous warp.
That by itself I could deal with, but what is worse is that all of the loose warp threads on either side of the weaver's knot are now tangling and making it almost impossible to get a shed without separating them each time the shed changes. I don't think I will tie onto an old warp in the future.
Final beer update: Keg time. I take my time when it comes to fermenting lagers, since at a minimum I want them to ferment for around three weeks and then lager for a few weeks after that. Sometimes I lager in the keg while it carbonates if I'm in a hurry, and other times in the fermenter.
As I transfer to the keg I collect a bit of the beer to take a final gravity reading for my brewing notebook (which I've maintained since 2009) and for a taste. Flat, but good!
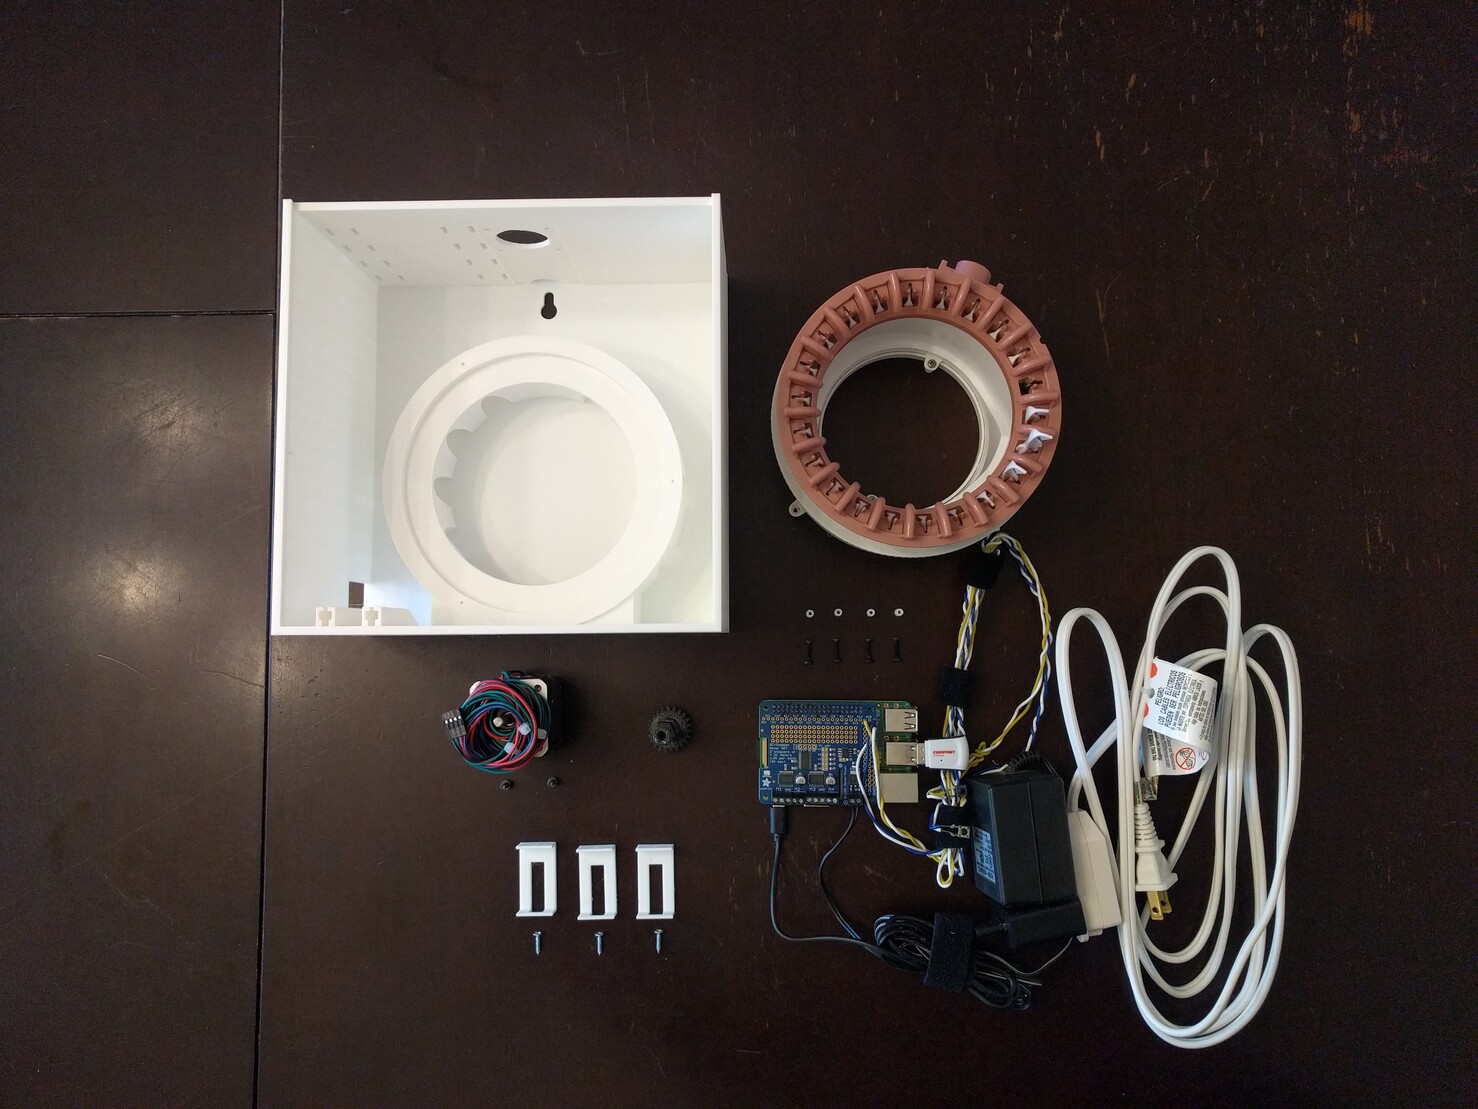
Knitting clock update: I discovered the bottom case was a bit too tall so I took advantage of the fact that I needed to print it again to do a few other refinements.
I also took advantage of needing to transfer all of the components from the old case to the new to take a *lot* of pictures documenting the step-by-step process of assembling this.
The next step is to finish refining the lid that will cover the bottom case.
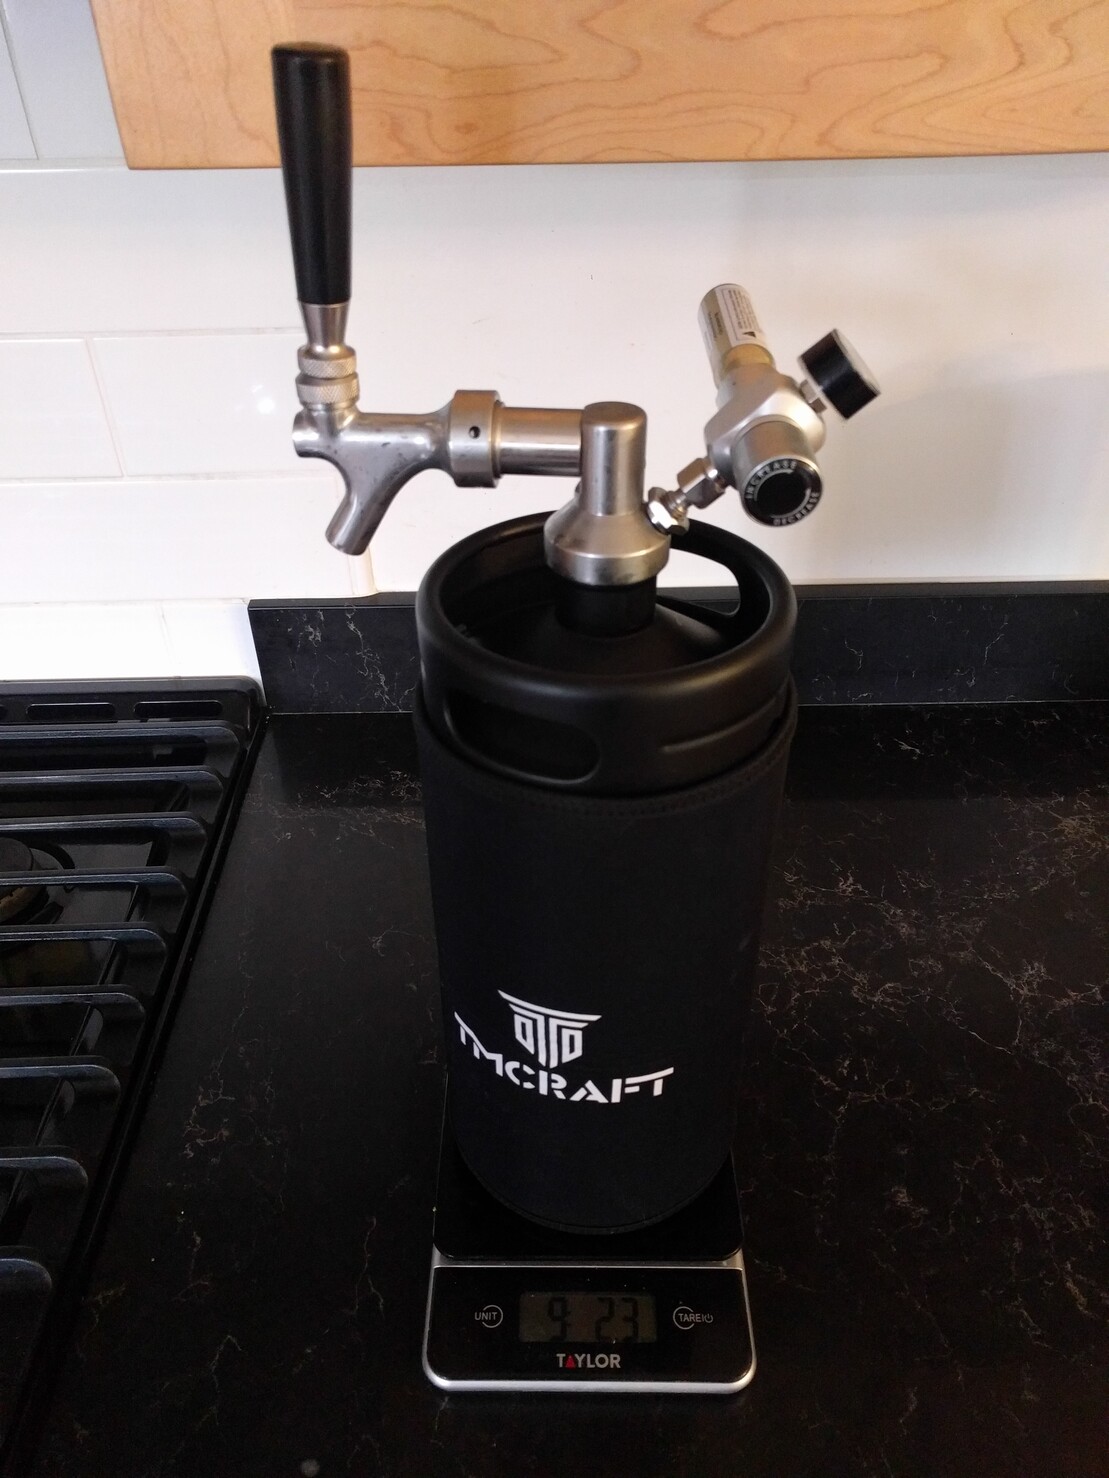
I recently invested in an 128oz mini-keg that fits in my fridge door. This lets me serve my homebrewed beer more conveniently than filling individual bottles. The downside is you can't tell at a glance how many more servings are in the keg.
The solution? I weighed the keg empty (~ 4 pounds) and now I can weigh the keg, subtract 4, and since a pint's a pound the world around, the number of pounds is approximately the number of pints left (in this case 5 pints).
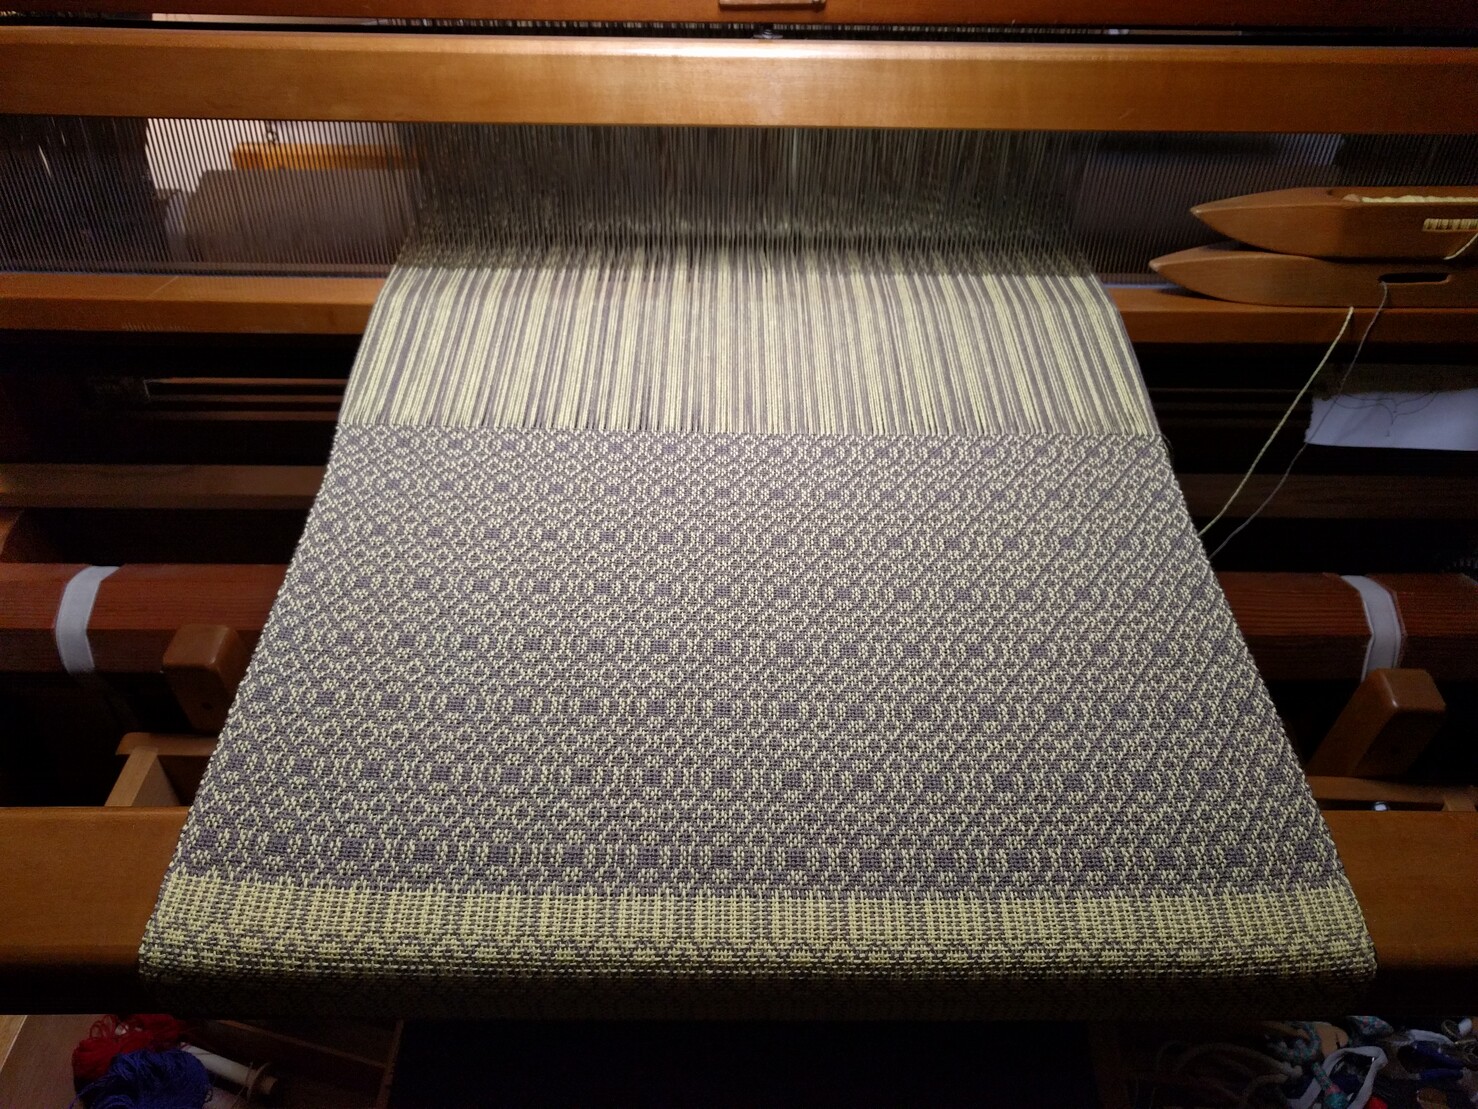
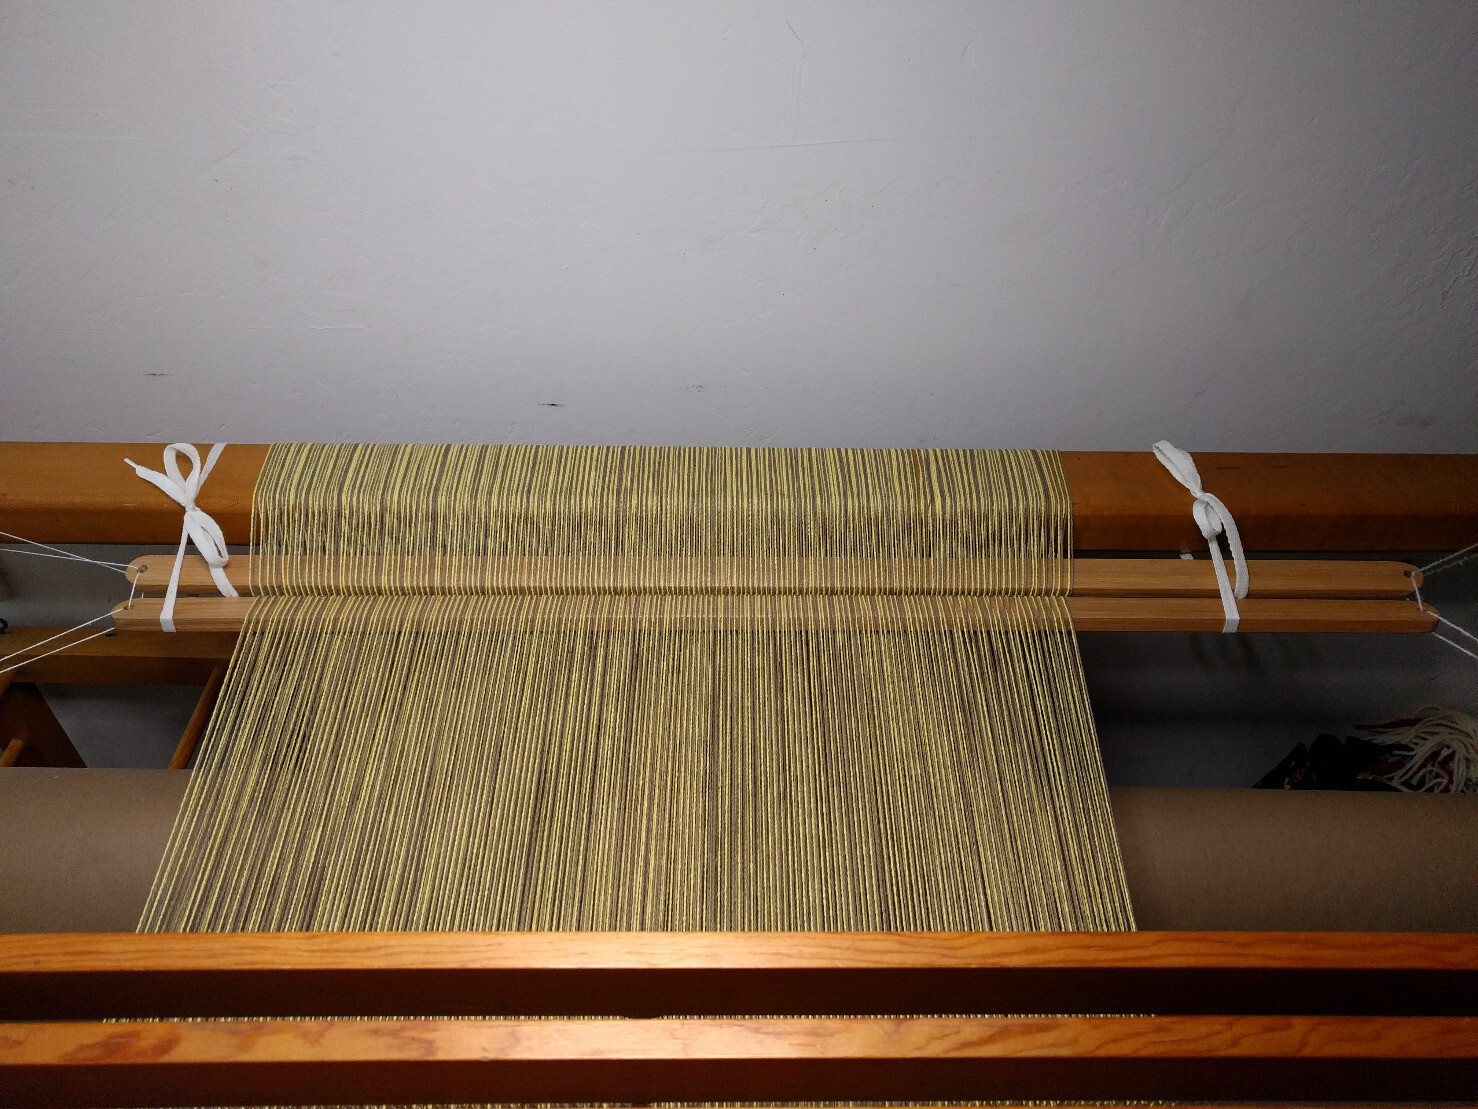
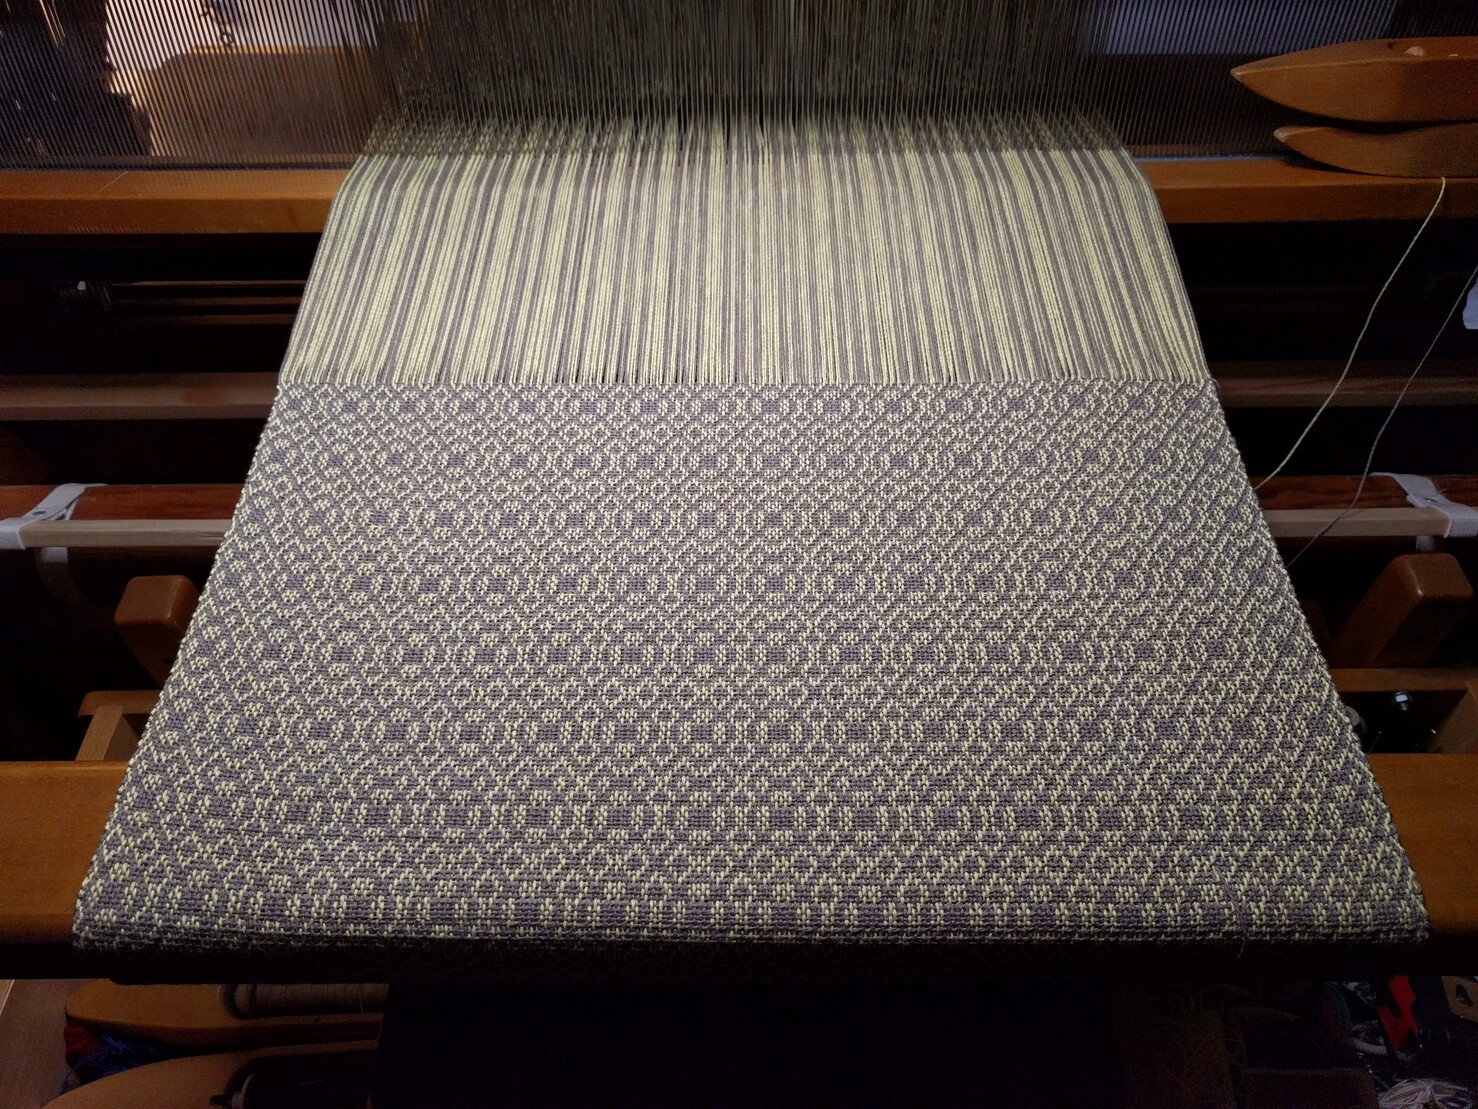
I'm halfway through the second doubleweave overshot towel, and so far things are going smoothly and mistake-free! I probably won't do another update on this project until they are off the loom and hemmed, unless a fun disaster strikes.
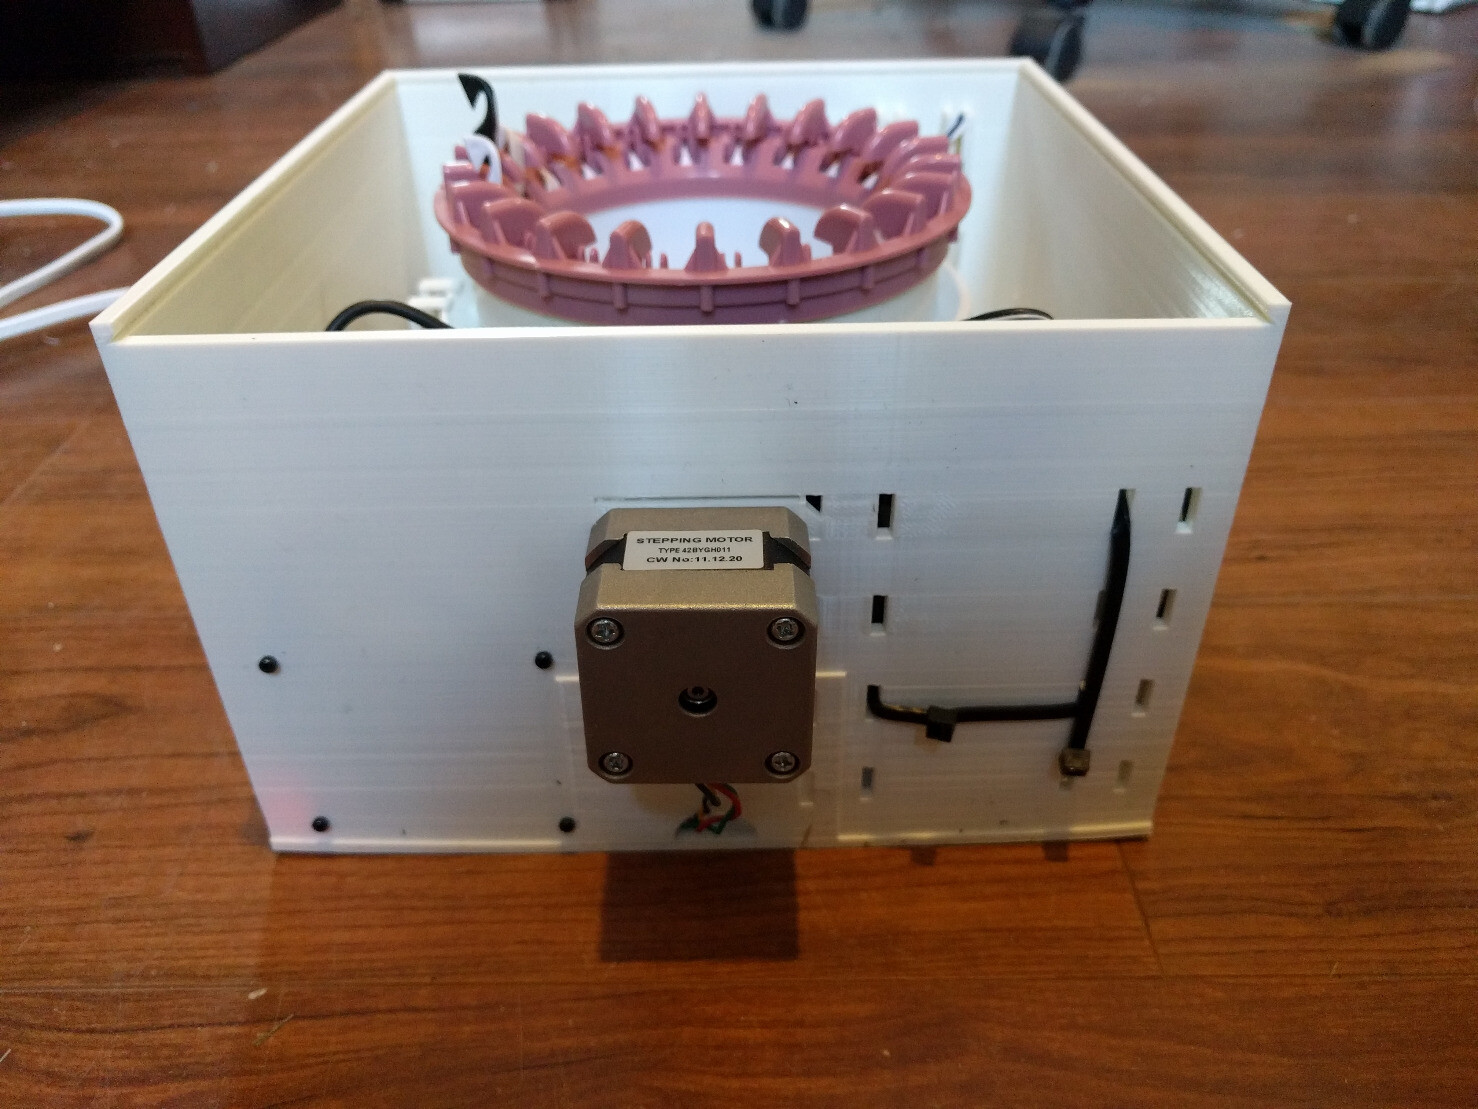
More progress on my @hackaday -inspired knitting machine clock (code name Tempus Nectit)!
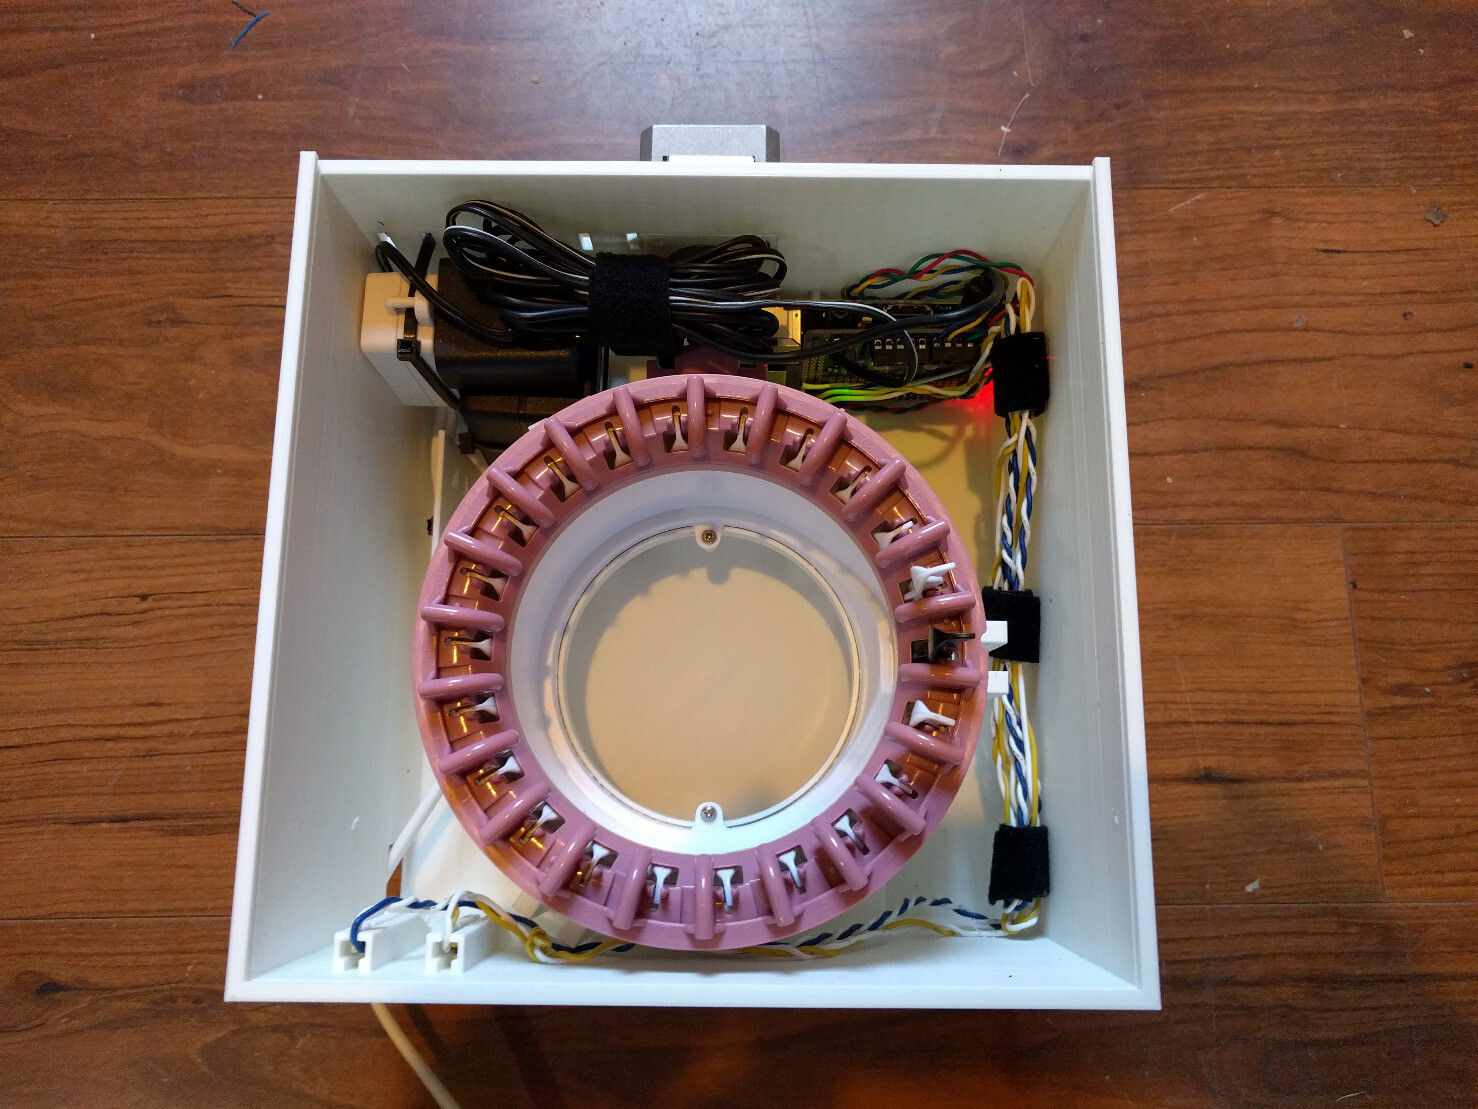
The bottom case printed successfully and I have mounted all of the major components: the Sentro 22-hook knitting machine, the stepper motor, power and the Raspberry Pi + Motor Hat.
I also wired two push buttons to what will be the bottom of the case that let you manually advance the knitting machine in each direction.
Next I design the front cover.
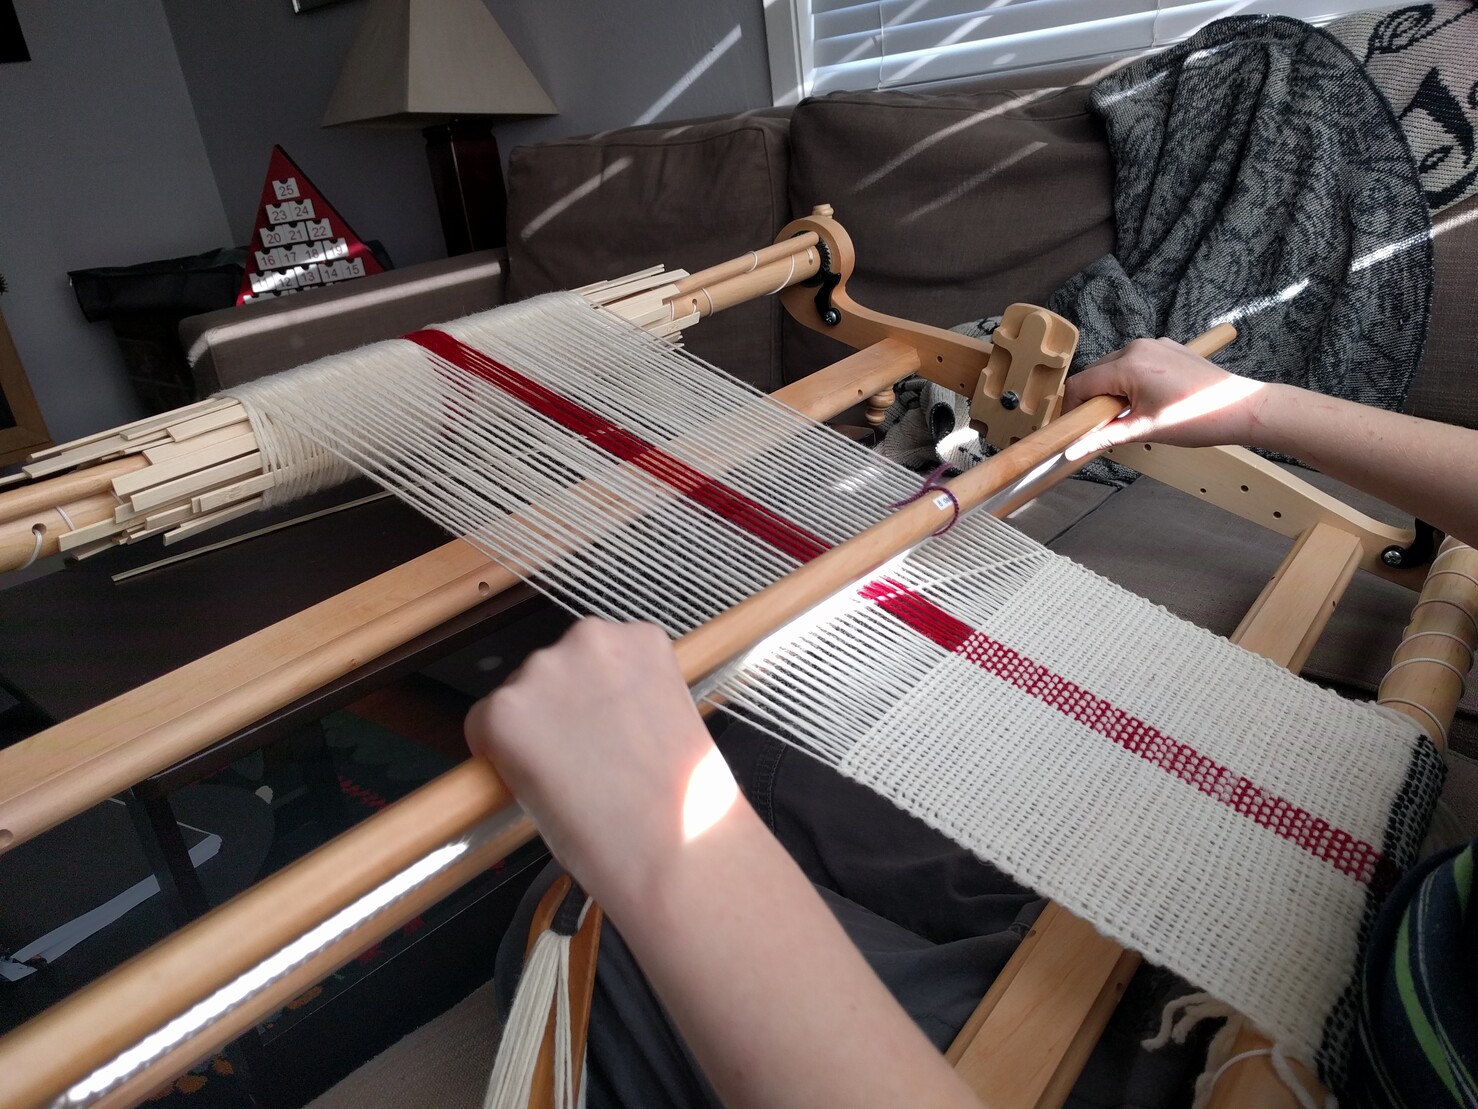
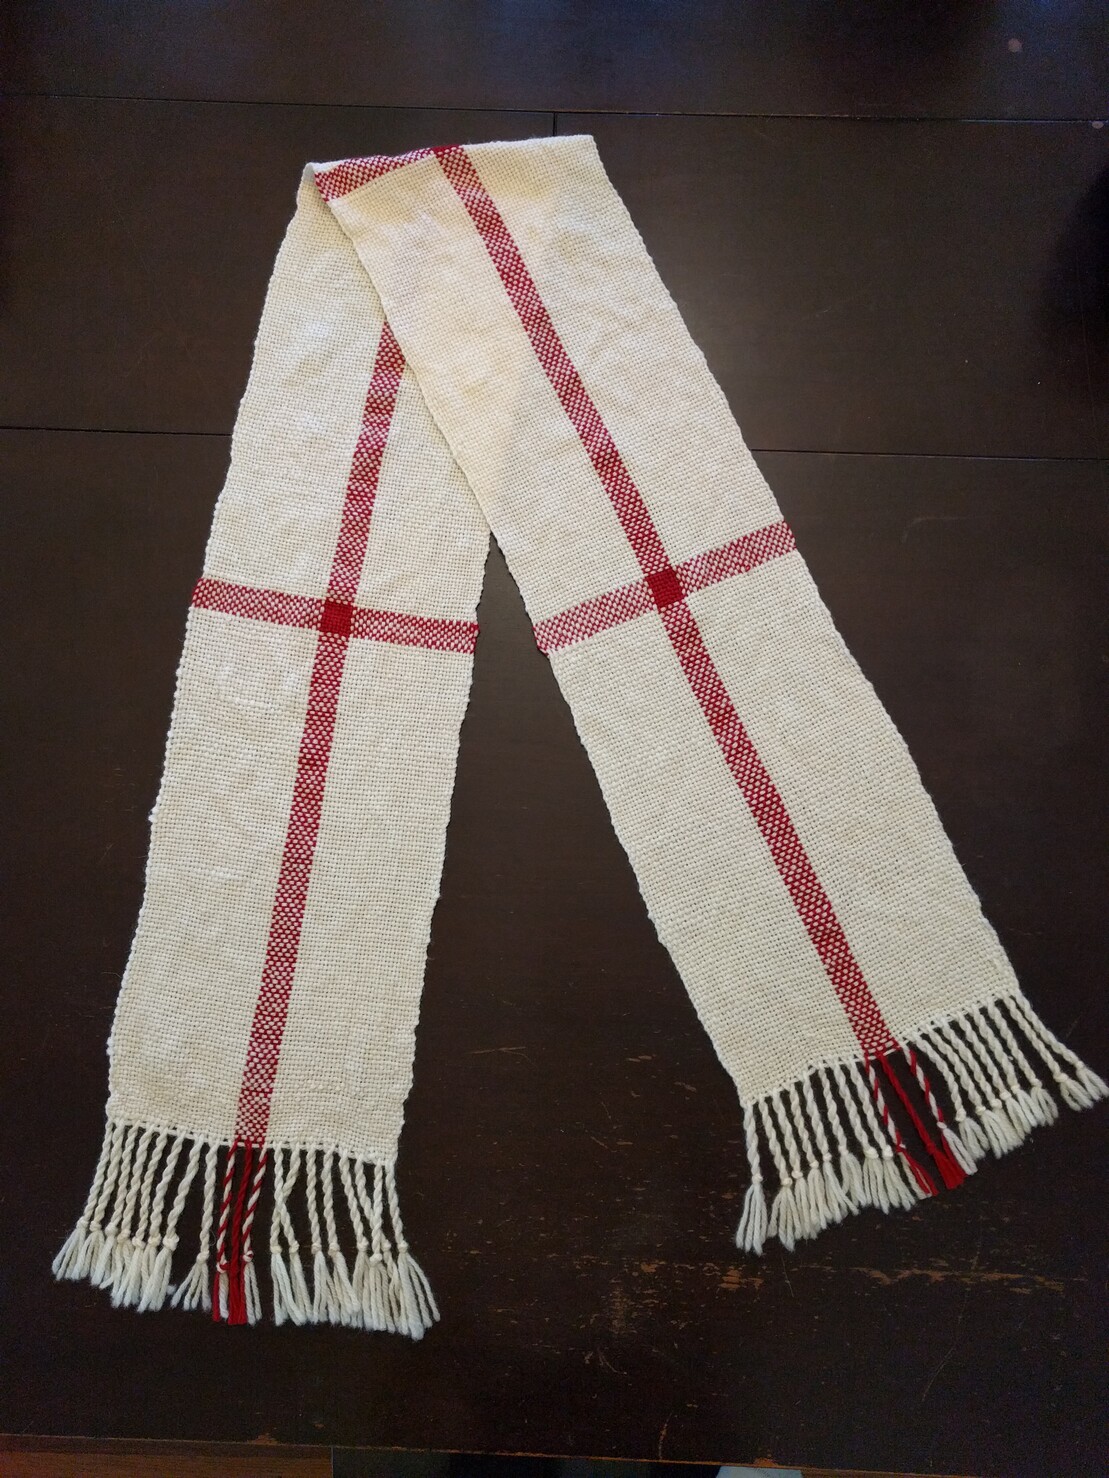
My son completed his first weaving project (he's 10). This white and red striped wool scarf was woven on a rigid heddle loom.
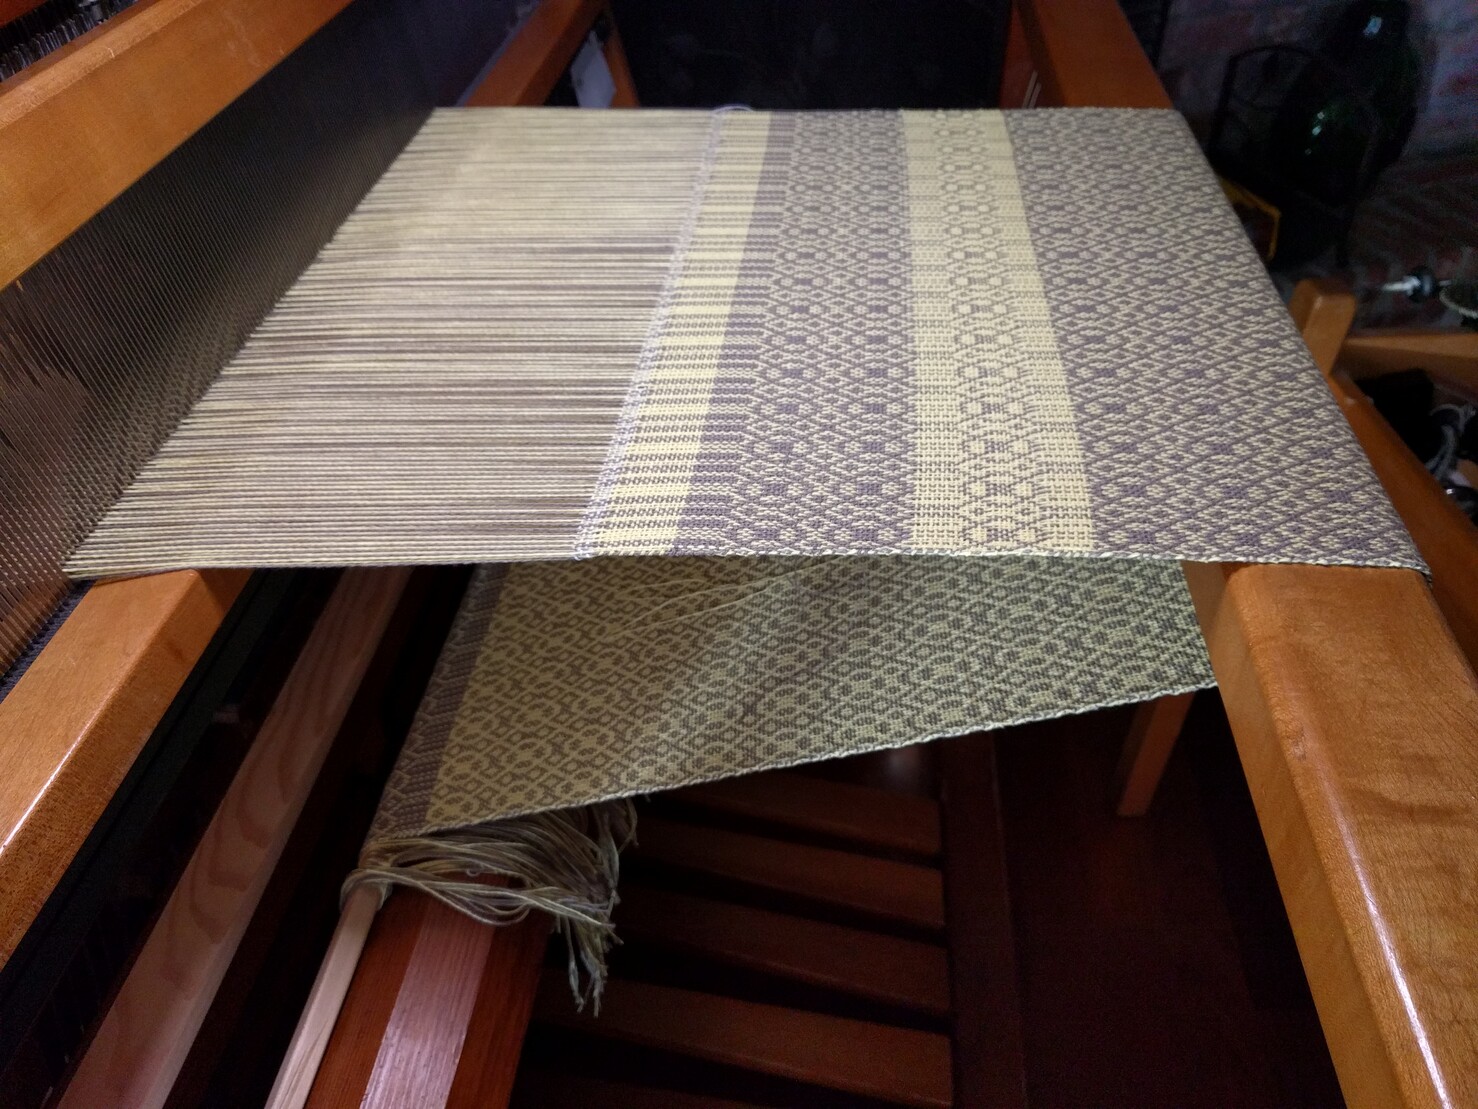
One towel down, two to go! From this angle you can see both sides and the reversible nature of this doubleweave pattern.
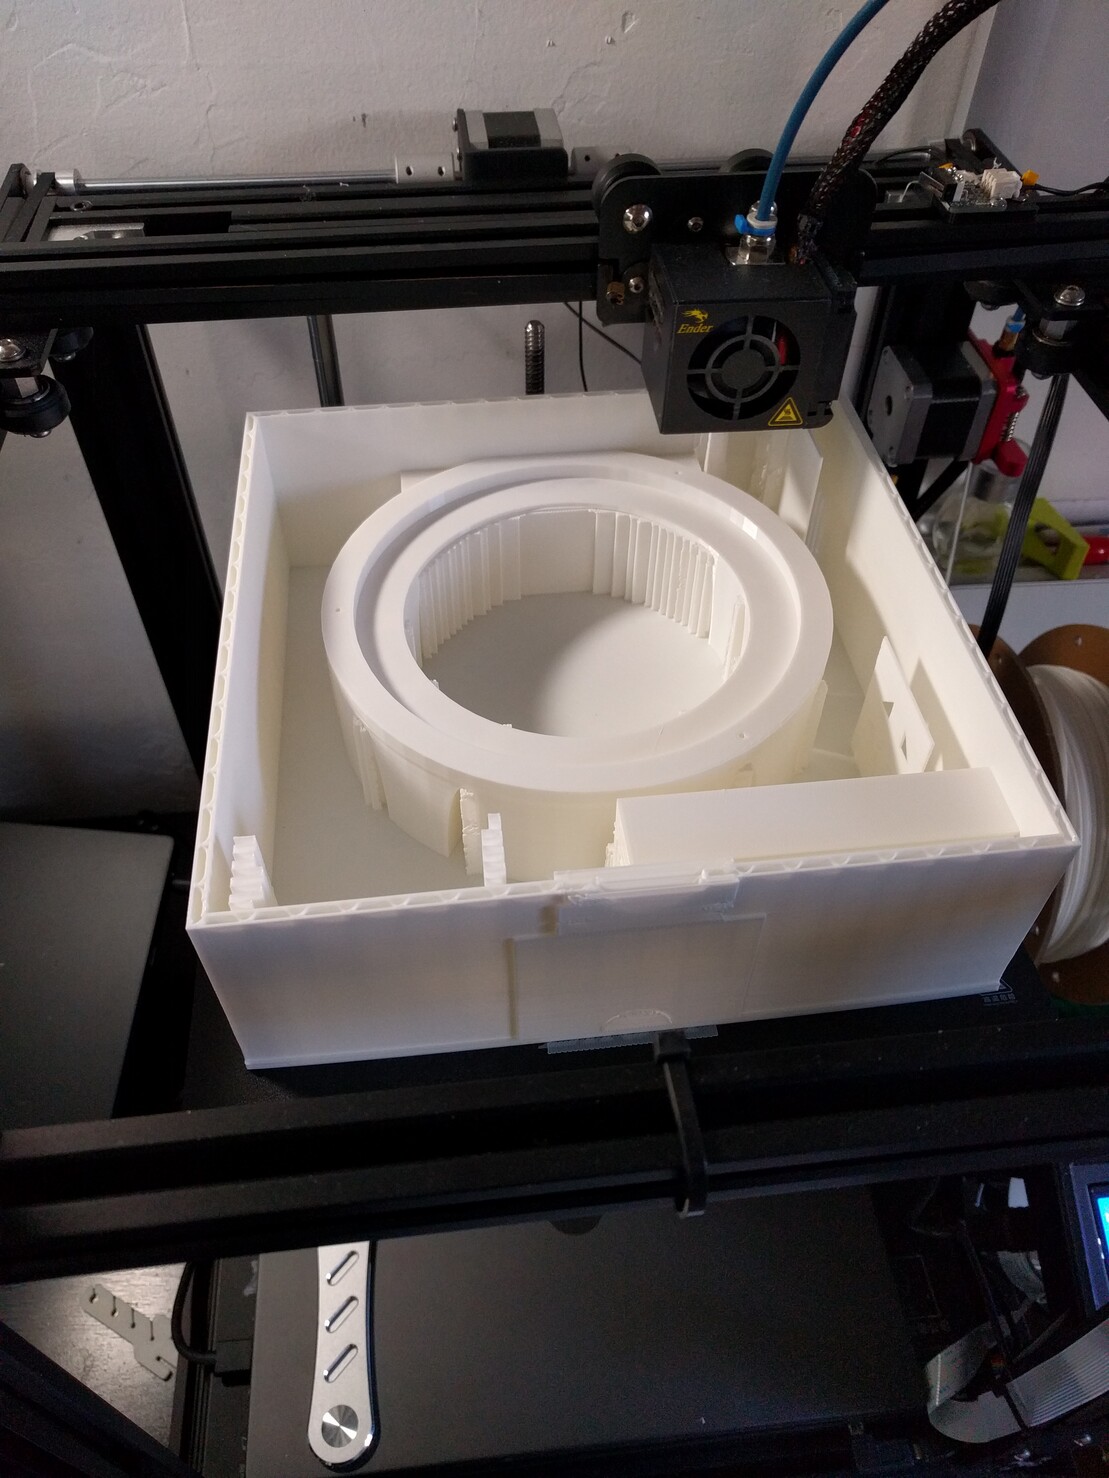
The second attempt is looking good for this 3D printed case for my knitting clock. Along with fixing some mistakes in my design, I also modified it so that it could print for the most part without supports. There was one area where that was unavoidable, so I added in basic supports. While there is a little cleanup where it bridged there, it's much less than I saw when I enabled internal supports in the first print.
See if you can spot the treadling errors! I managed to make the same mistake three different times in pattern repeats so far. Combined with the threading mitsake from earlier, this is rapidly becoming the "warm up" towel where I hopefully get all of the mistakes out of my system before the next two.
We are 40 hours in and the structure that holds the knitting machine itself is completed. All that is left are the walls which also have button and motor mounts in them.
After almost 16 hours, the case for my knitting clock is starting to take shape. You can now make out the central structure that will hold the knitting machine itself in place. While I tried to reduce overhangs, due to the nature of this model there still are quite a few so there will be a lot of internal support material to remove when this is done.
I've been quiet about my hackaday-inspired knitting clock project ever since I decided to replace the 48-hook machine with a 22-hook model, but that's because I've been busy learning 3D modeling!
I realized the new 22-hook knitting machine fits on my 3D printer bed, so instead of a wooden case, I designed a custom case for it using Tinkercad. I just started an epic 2 day, 8-hour print of the case that takes up my entire print bed!
- Personal Site
- https://kylerank.in
- Personal Bibliography
- https://kylerank.in/writing.html
Admin
Technical author, FOSS advocate, public speaker, Linux security & infrastructure geek, author of The Best of Hack and /: Linux Admin Crash Course, Linux Hardening in Hostile Networks and many other books, ex-Linux Journal columnist.
Joined Apr 2019