

Kyle Rankin @kyle@librem.one
- Personal Site
- https://kylerank.in
- Personal Bibliography
- https://kylerank.in/writing.html
Admin
Technical author, FOSS advocate, public speaker, Linux security & infrastructure geek, author of The Best of Hack and /: Linux Admin Crash Course, Linux Hardening in Hostile Networks and many other books, ex-Linux Journal columnist.
Joined Apr 2019
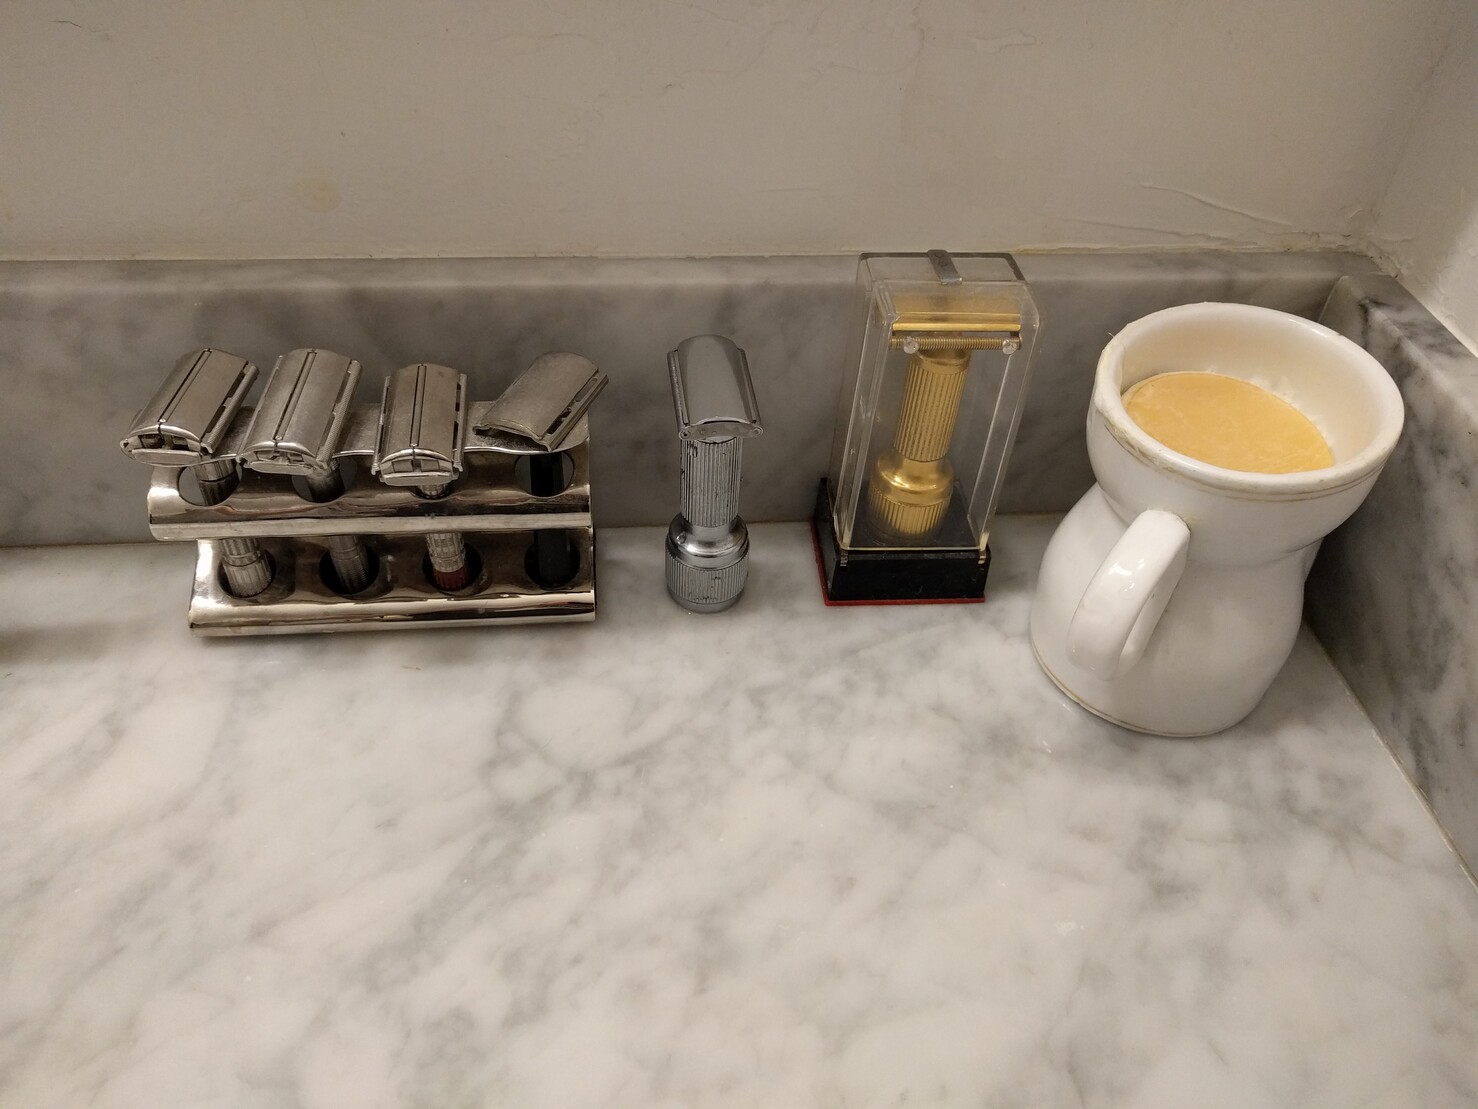
I rotate through my set of favorite razors whenever it's time to change the blade. The Gilette Fat Boy and Slim (far left in picture) are great razors, as is the red tip (3rd from left). Yet each time I rotate to the Stahly Live Blade (center of picture) I'm surprised and impressed again at how well it shaves.
I don't know if it's the fact that it vibrates, or the design of the head, but with a new sharp blade it beats everything else in my collection. Underrated razor.
The best way to get over the fear of messing up something you have handwoven is to put it to use right away!
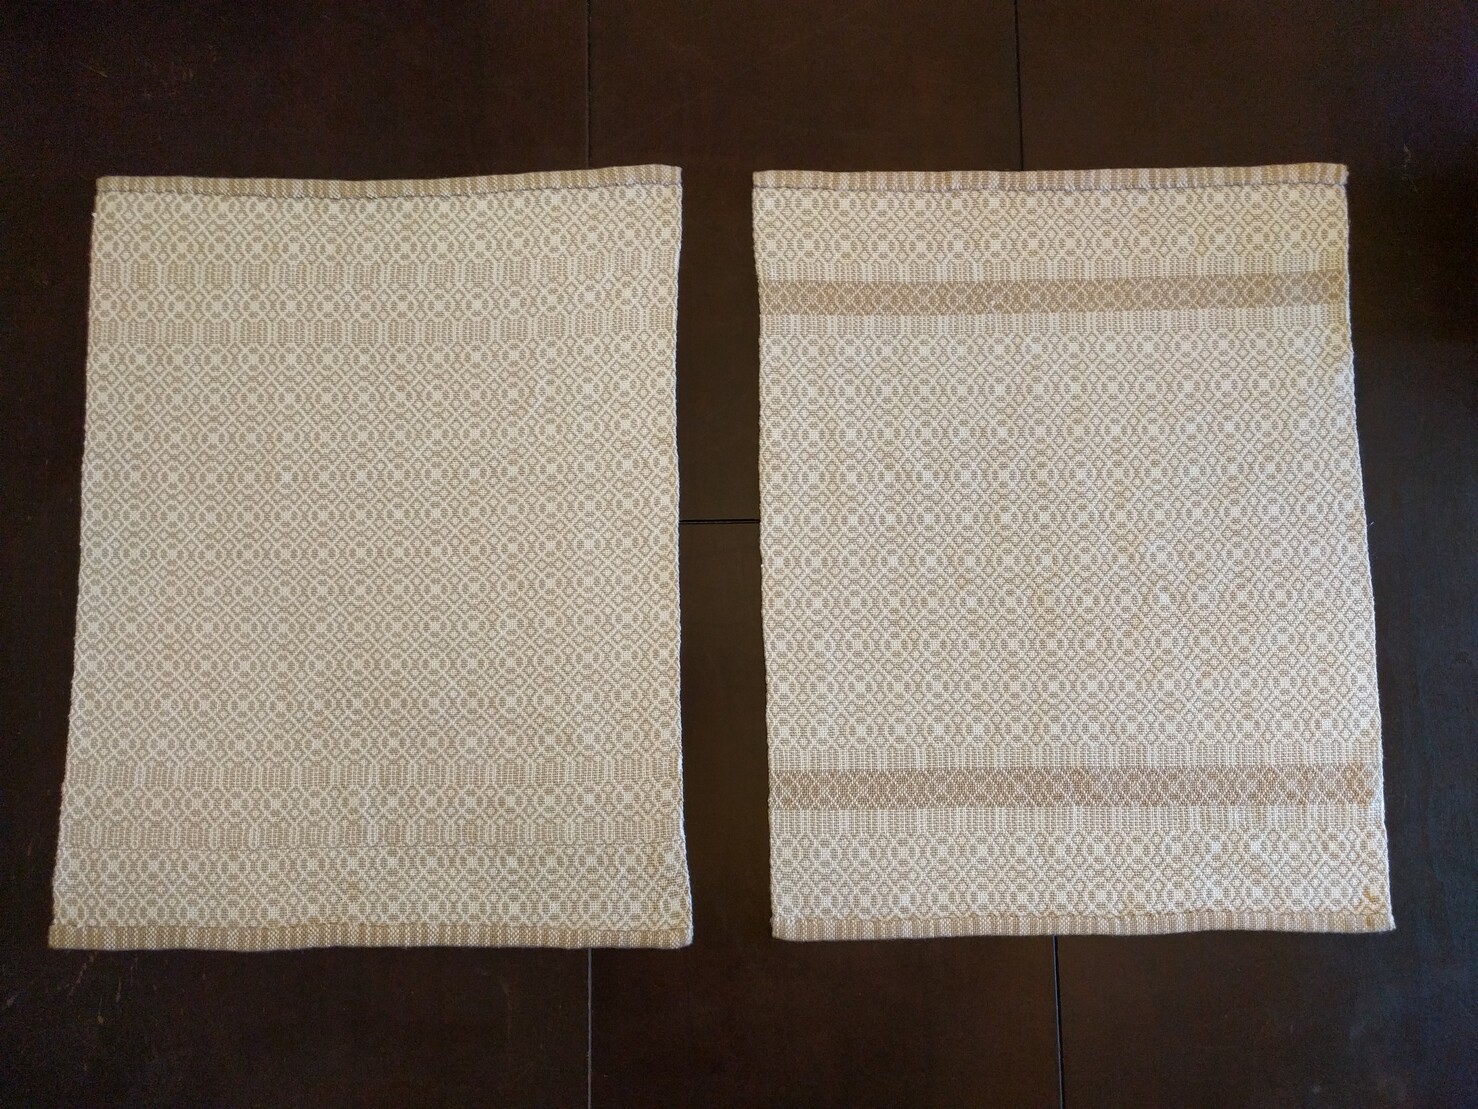
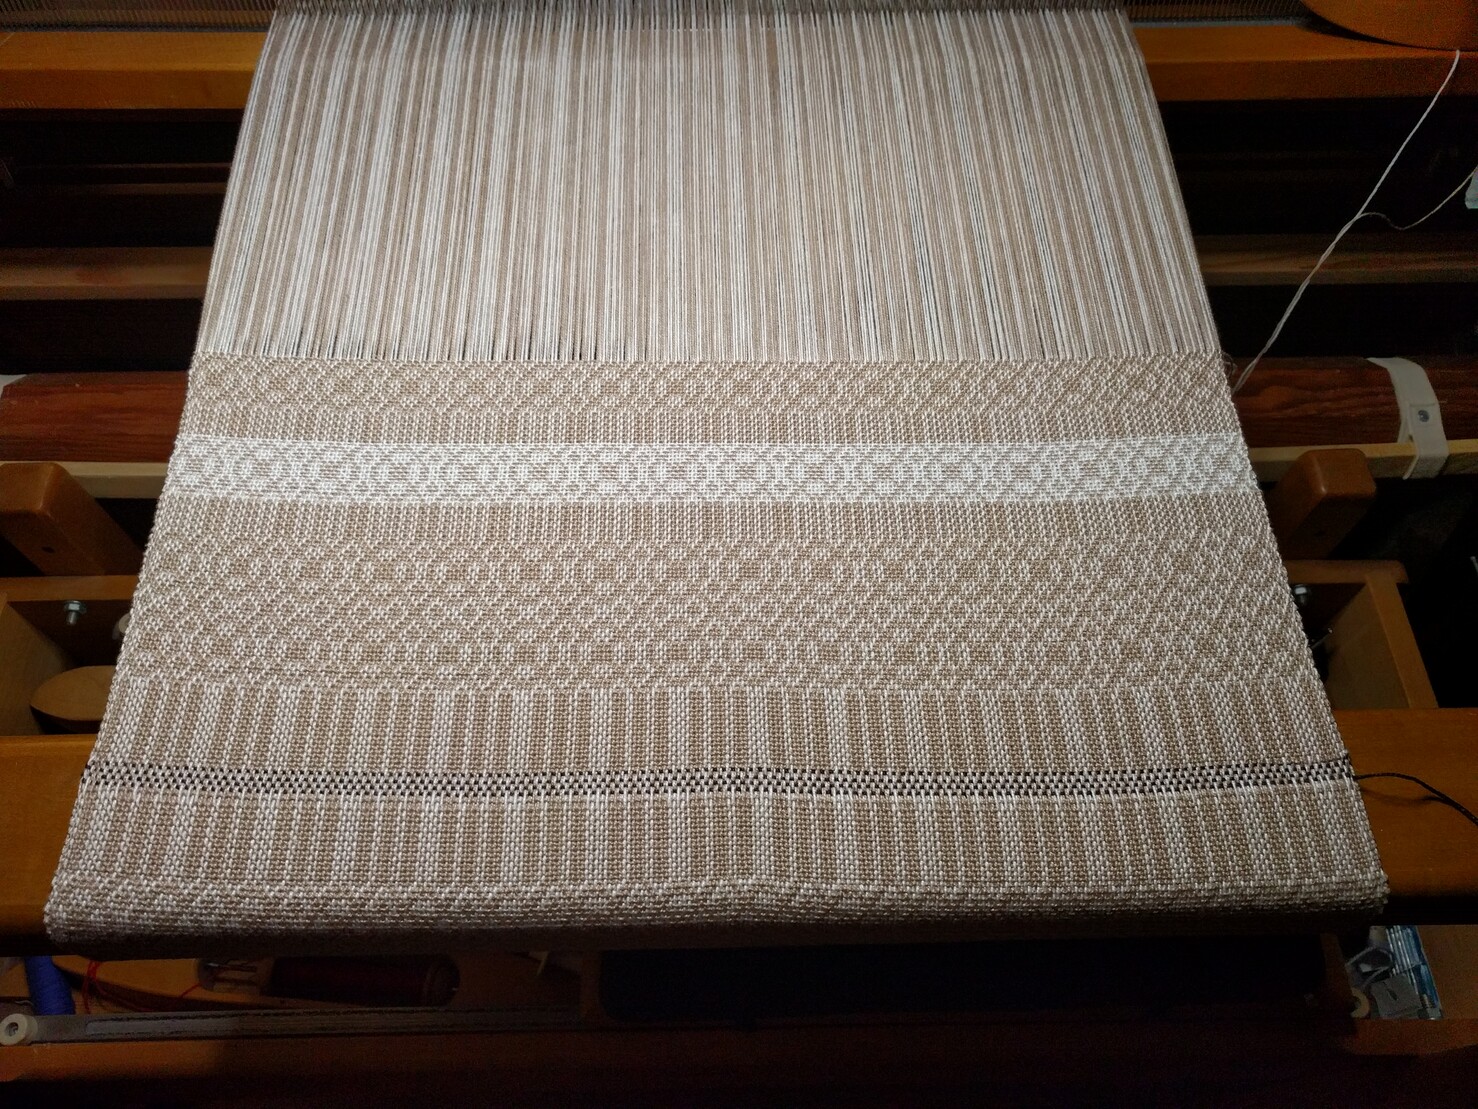
I finished weaving my pair of doubleweave overshot hand towels! I'm really happy with how these turned out.
In these pictures you can see how the colors invert on the opposite side of the towel. On one towel I experimented with inverting the colors for the stripe and I think it does add an extra dimension and visual interest to it, but I'm also curious which of the two you prefer. I also subtly modified the pattern on that one so the pattern around the stripe was symmetrical.
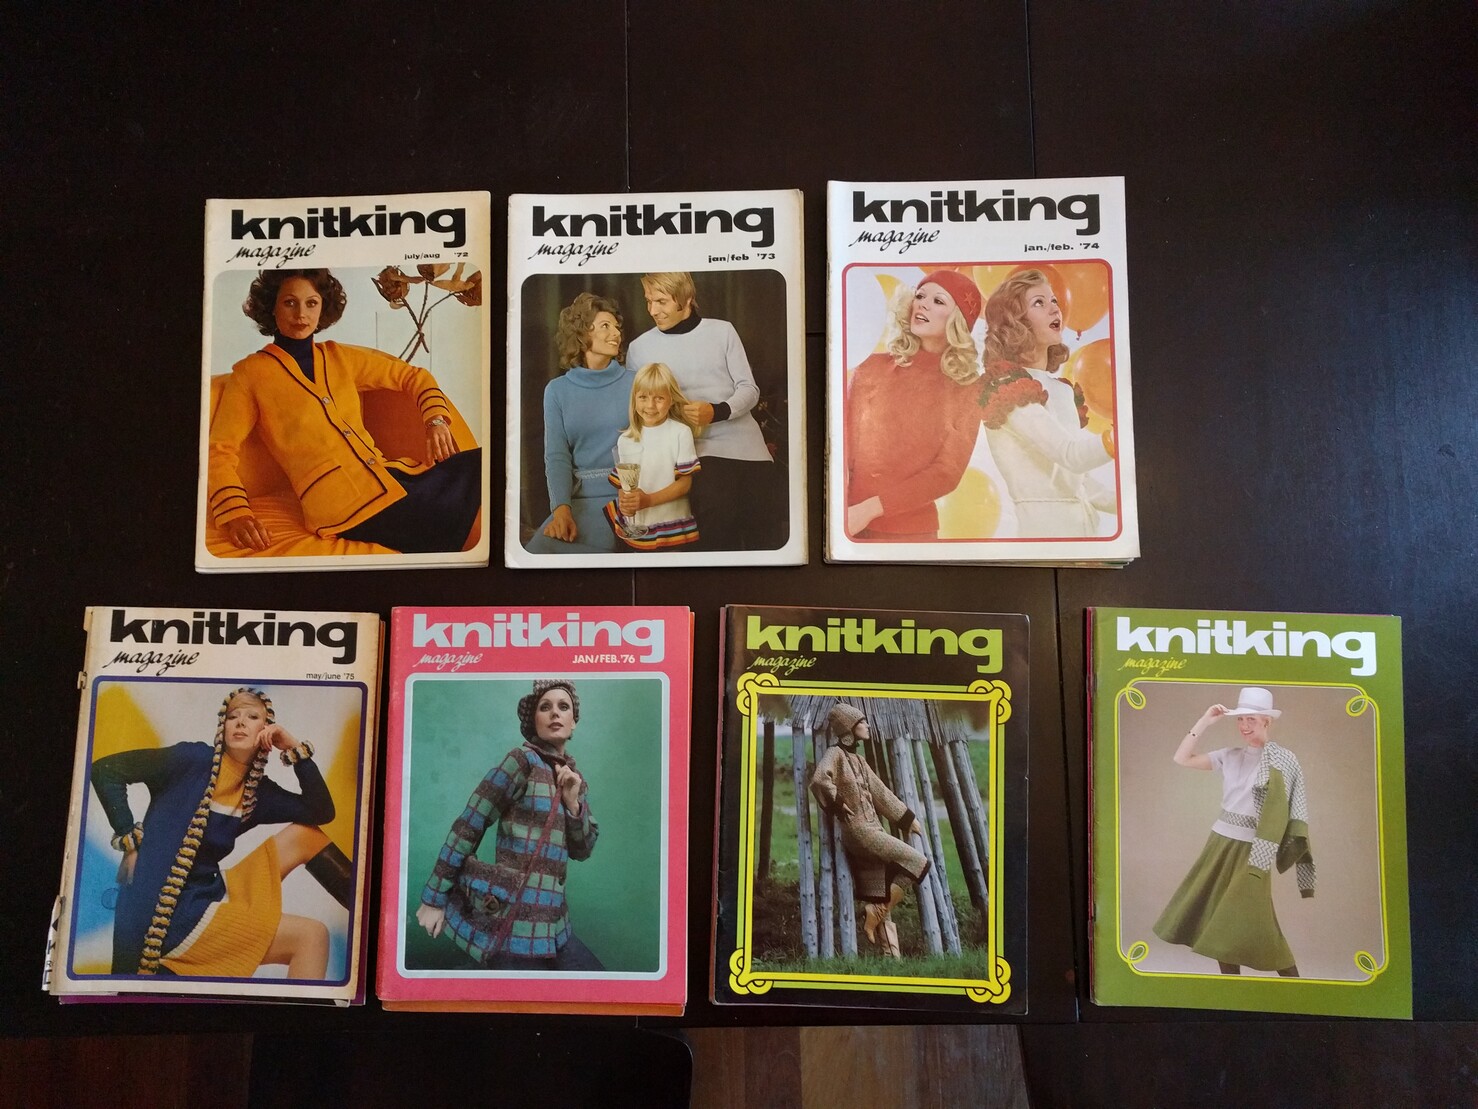
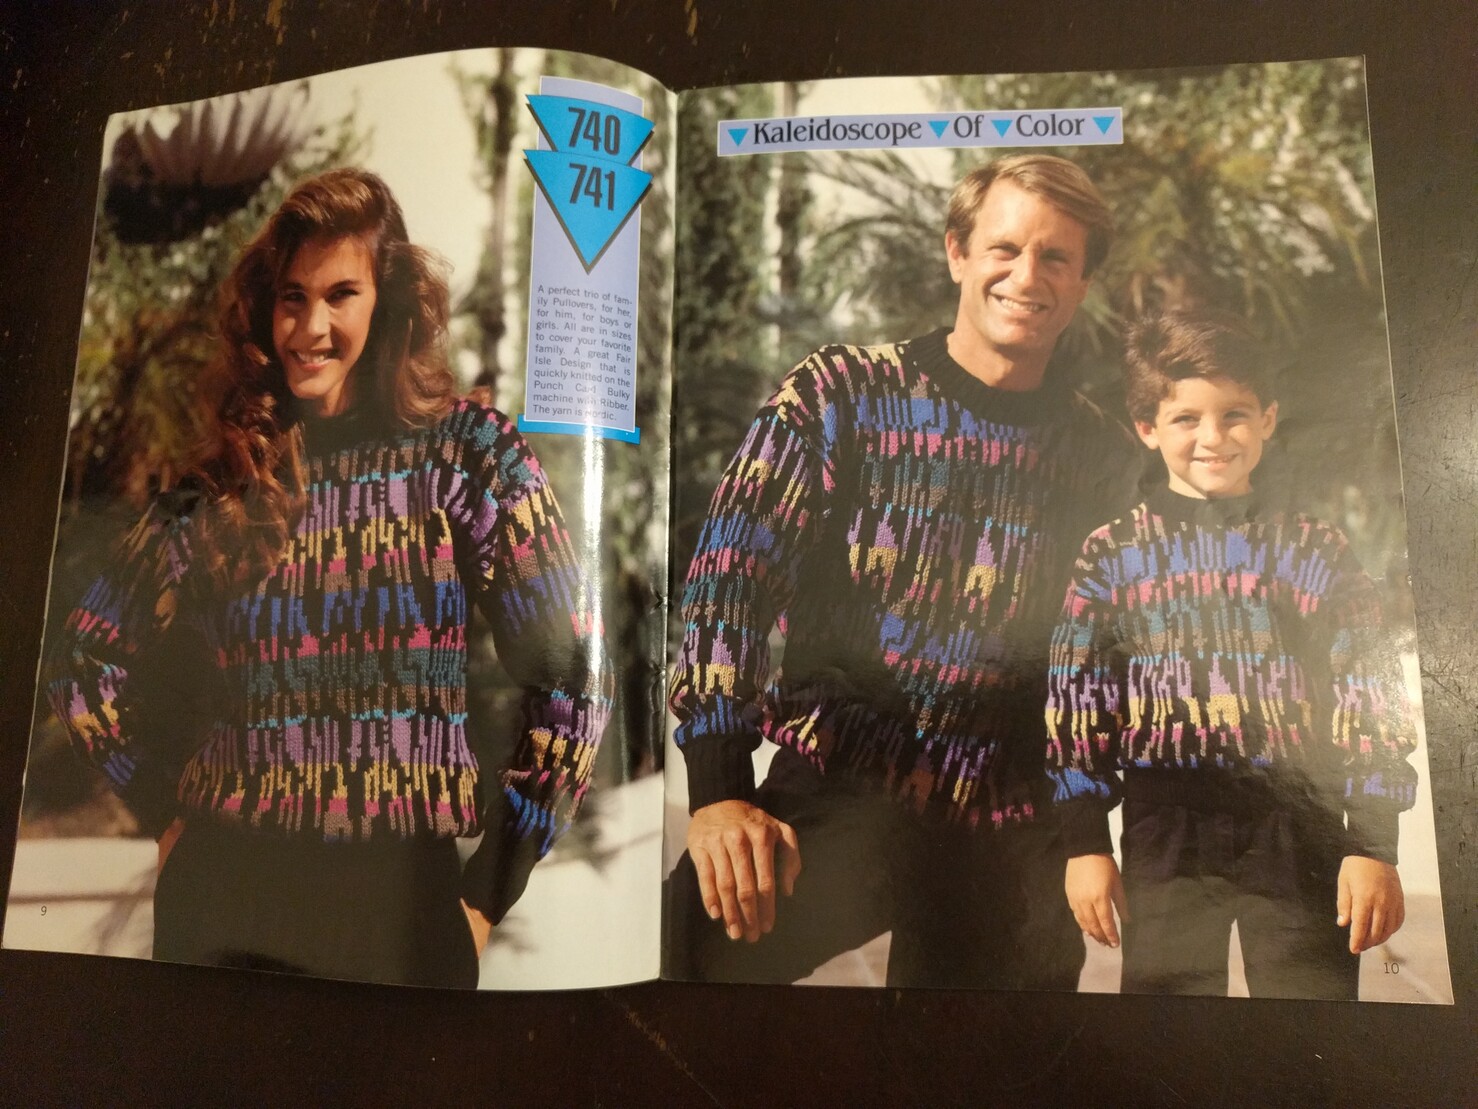
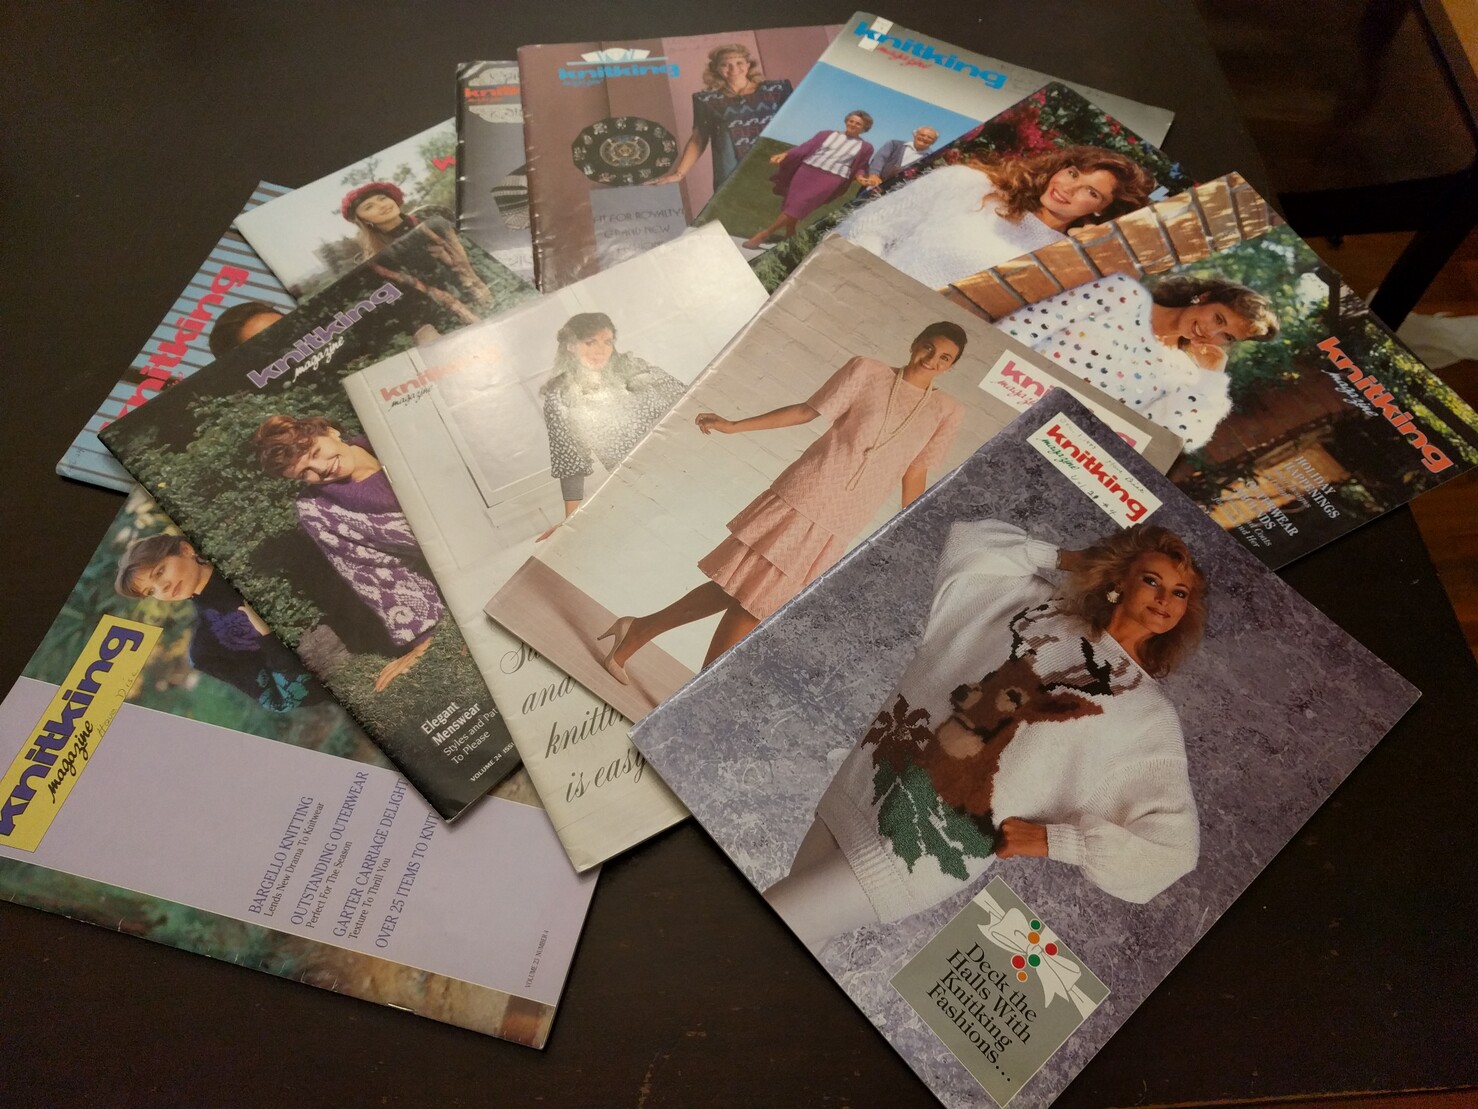
Another batch of vintage Knitking magazines arrived! This is an even larger batch than the last one from the late 80s and early 90s, and spans the years 1972 through 1978. I have the full year's worth of issues in some cases in this batch.
My wife reviewed the last batch and while she found many of the pictures amusing, she didn't want me to try to make any of them. We'll see whether this batch from the `70s does any better!
For the second fancy hand towel, I'm experimenting with inverting the colors for the stripe section. I like the effect but now I'm wondering whether it would be even better to invert the colors for the borders around the stripe as well. The problem is, now that I've committed to this, I can't really try that idea out on the other half of this towel without making it asymmetrical.
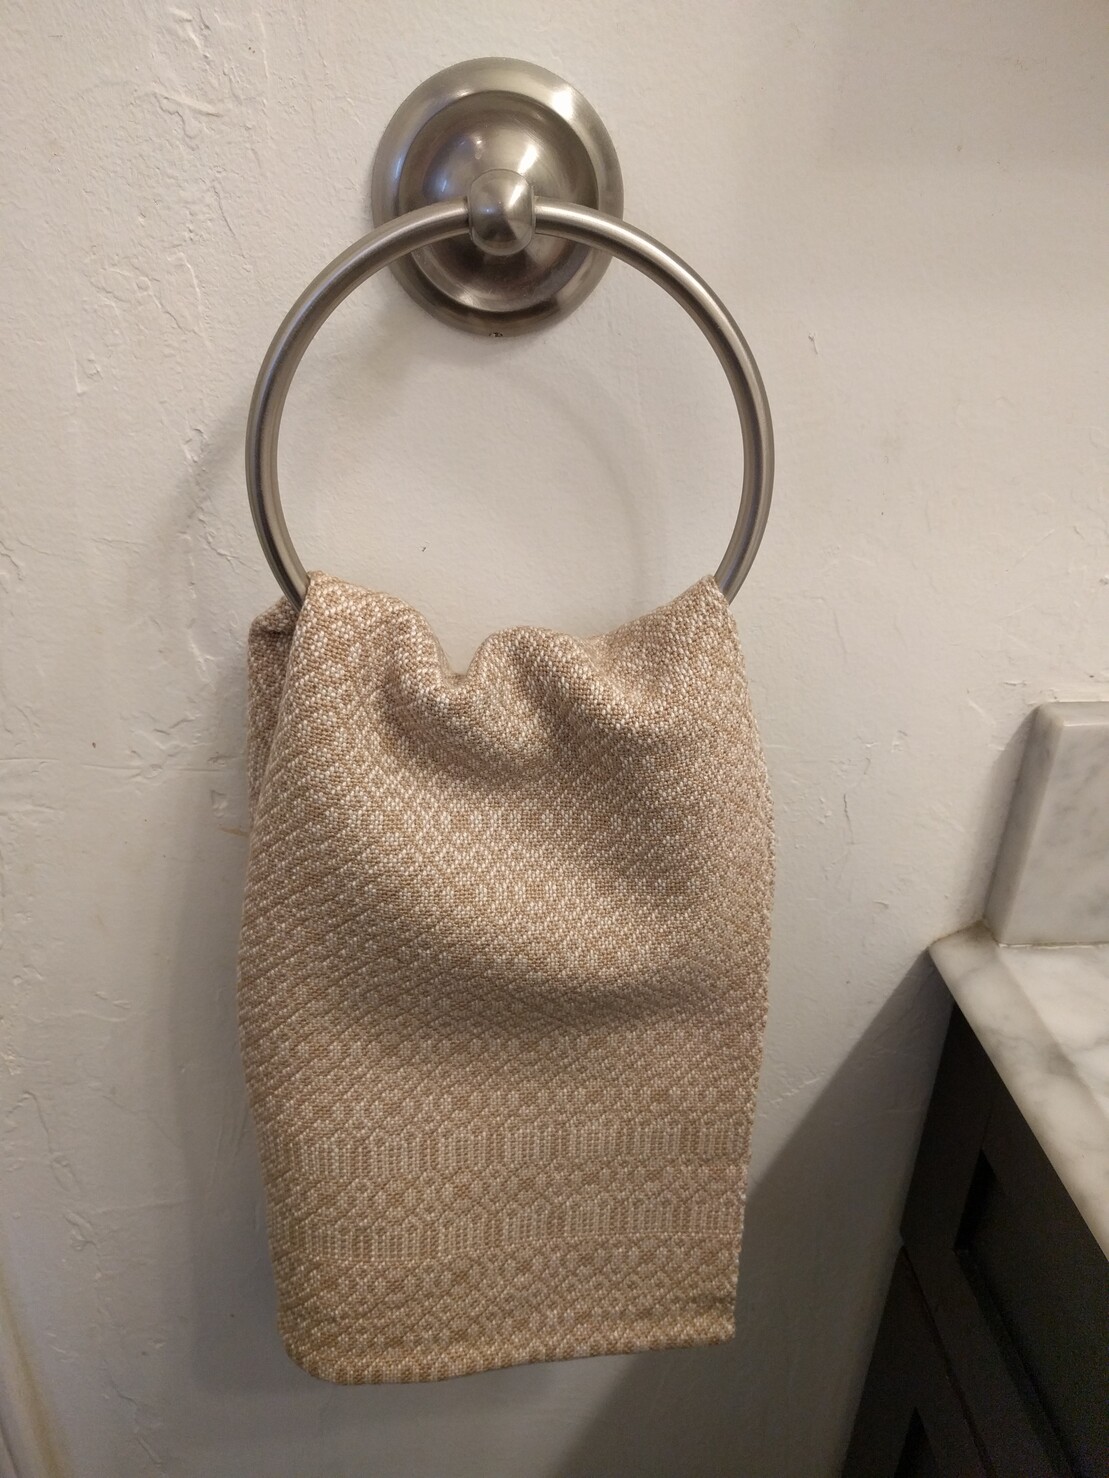
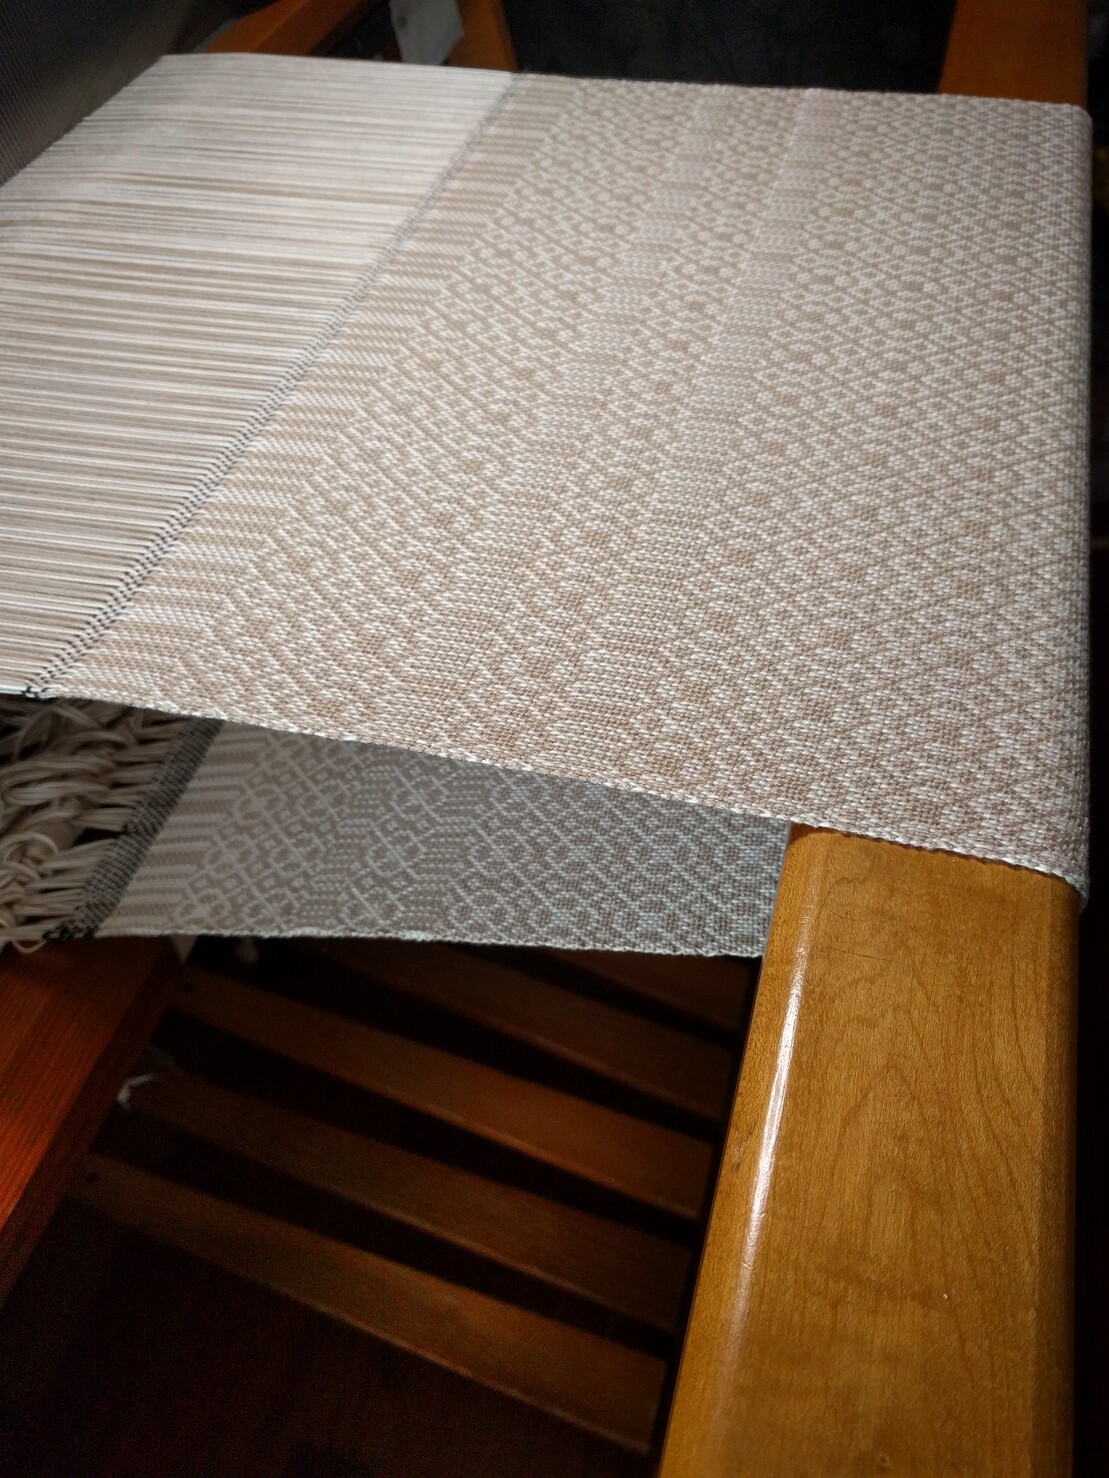
I finished weaving the first in a pair of fancy hand towels. From this angle you can see how the doubleweave overshot technique makes the pattern reversible--the opposite side of the fabric has the same pattern but the colors are inverted. I also somehow leveled up on my selvedges partway through this towel.
These are for us to use and don't have to be a matching pair, so I'm going to experiment with a different stripe pattern for the second one.
I finally started weaving the next in my series of fancy-so-you-feel-guilty-using-them household items: fancy cotton hand towels!
This project is an excuse to try doubleweave for the first time. In this case I'm doing a doubleweave overshot technique which results in a dense, thick fabric without the long floats overshot usually has.
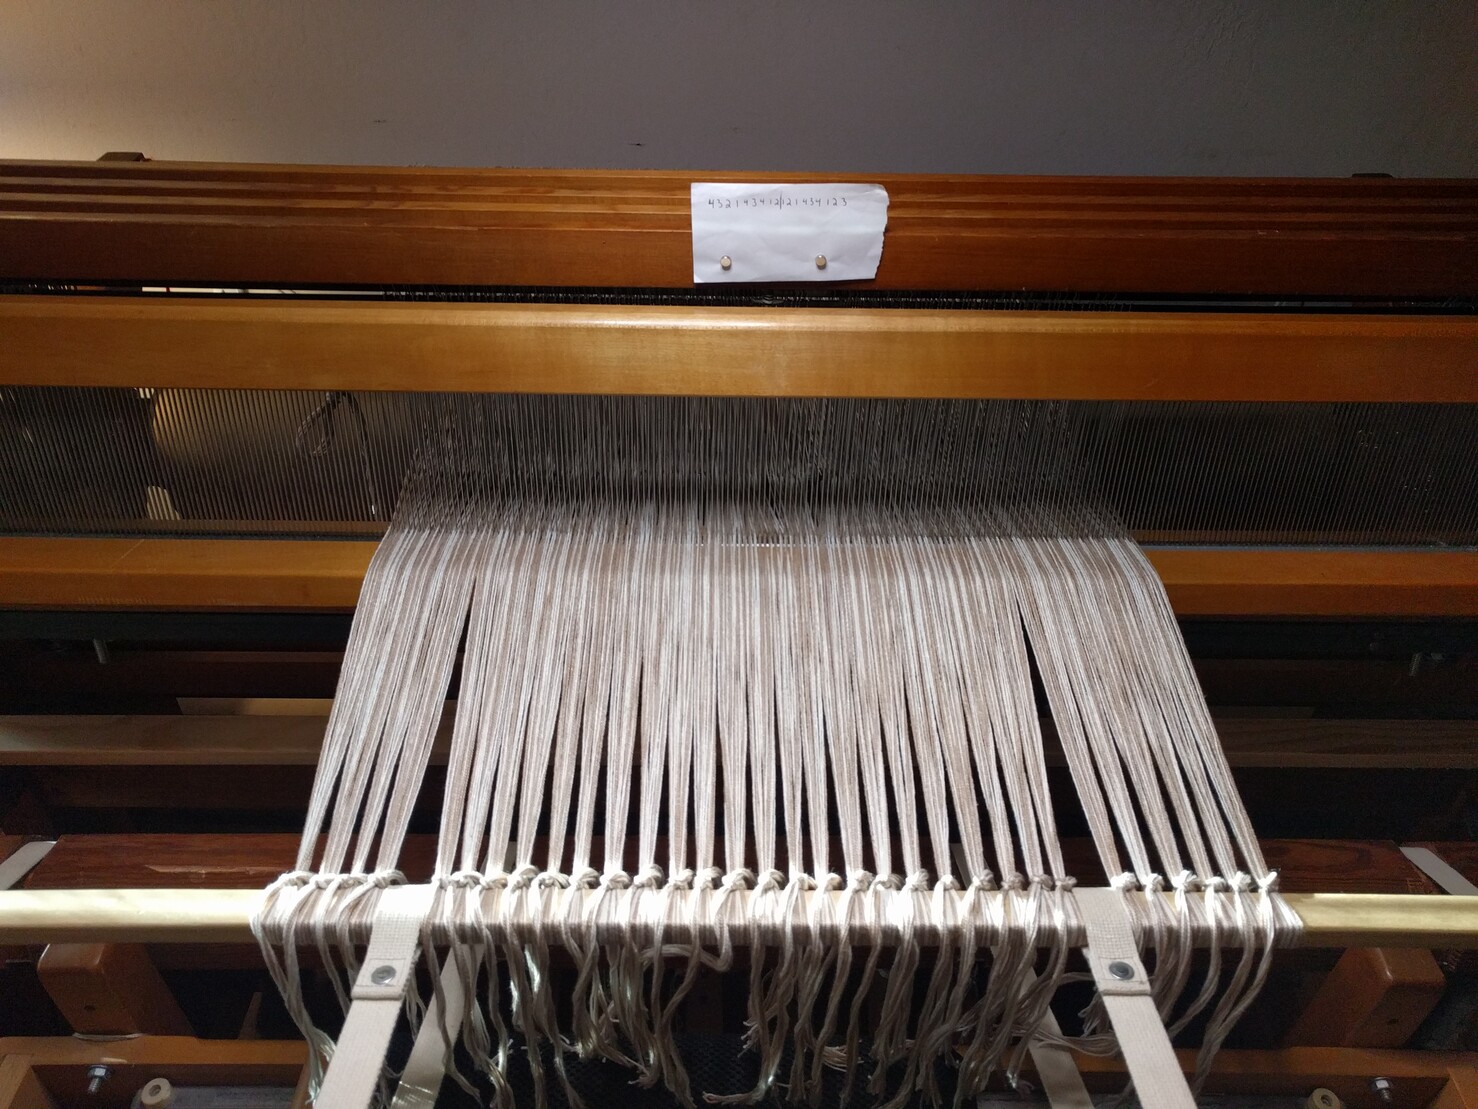
When I finished threading my warp, I discovered I had some unexpected threads left over. Oops. So when I sleyed the reed, I painstakingly double-checked every threading and caught a few mistakes.
In one case I had to insert temporary heddles, and halfway through I found I threaded a pattern twice in a row, so I had to shift the remaining 200+ threads, a pair of heddles at a time. After 13 hours total to measure warp and dress the loom, I'm now ready to weave.
So I bought a set of vintage Knitking magazines from the late 1980s, early `90s so I could learn more about garment construction for my knitting machine and... wow...
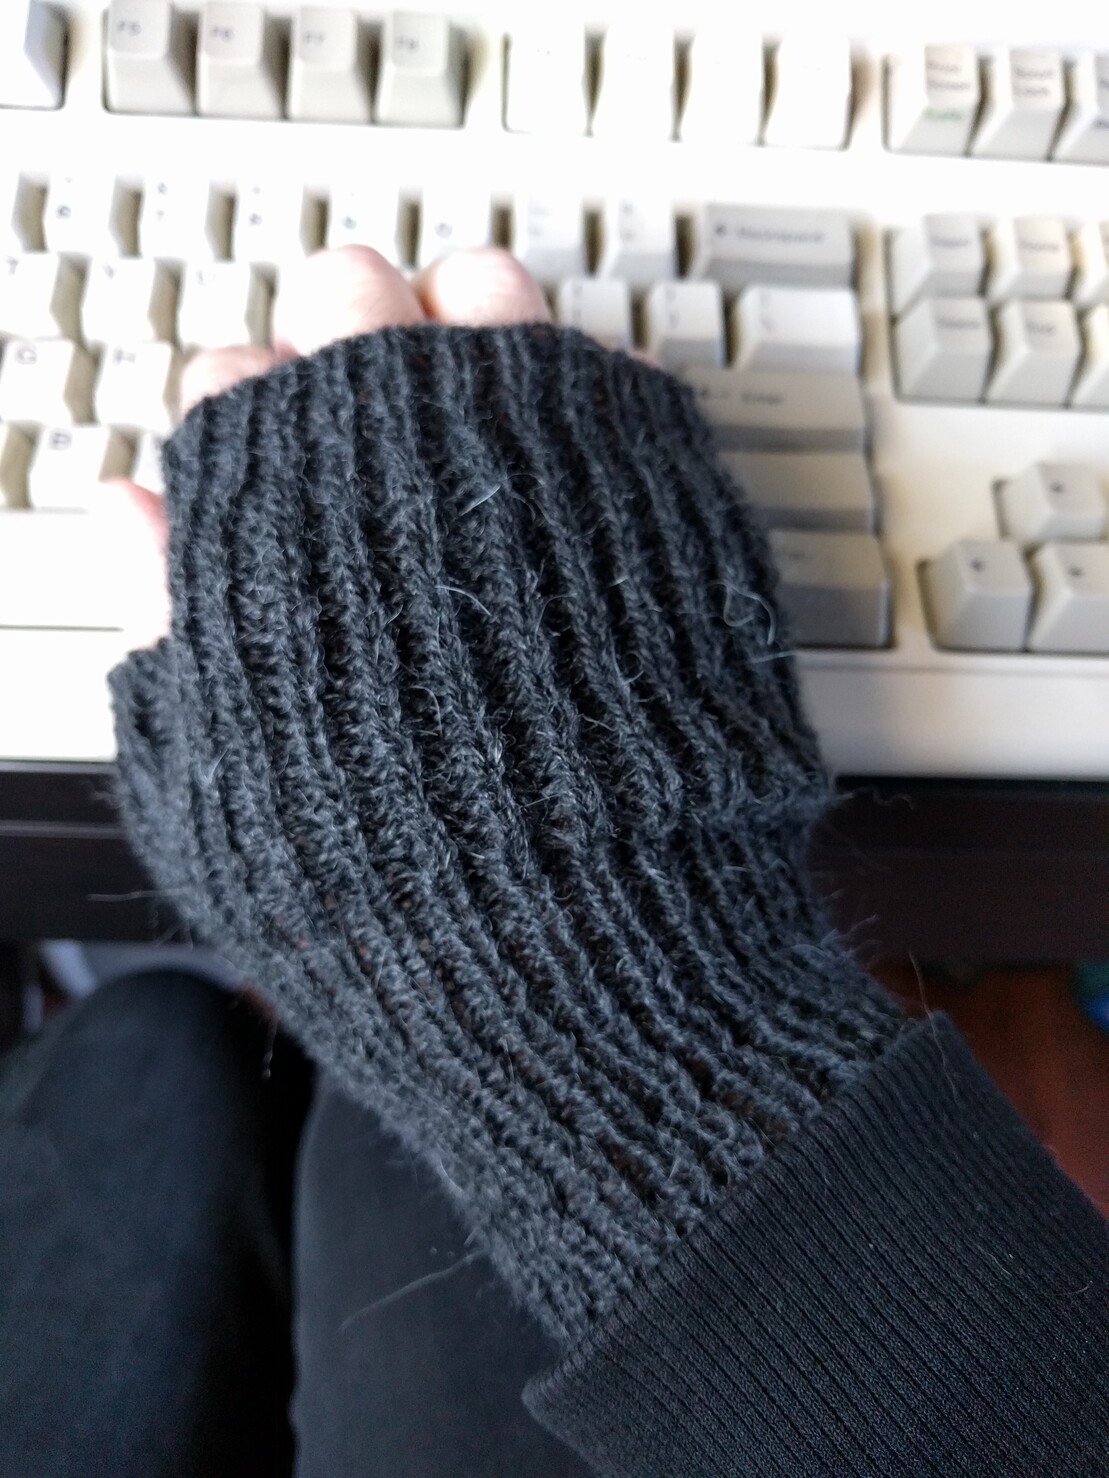
It was officially cold enough when I got to my office this morning (~5C) that I broke out my new fingerless mittens I made on my knitting machine a few weeks back. I did a pretty poor job stitching them together but they do the job!
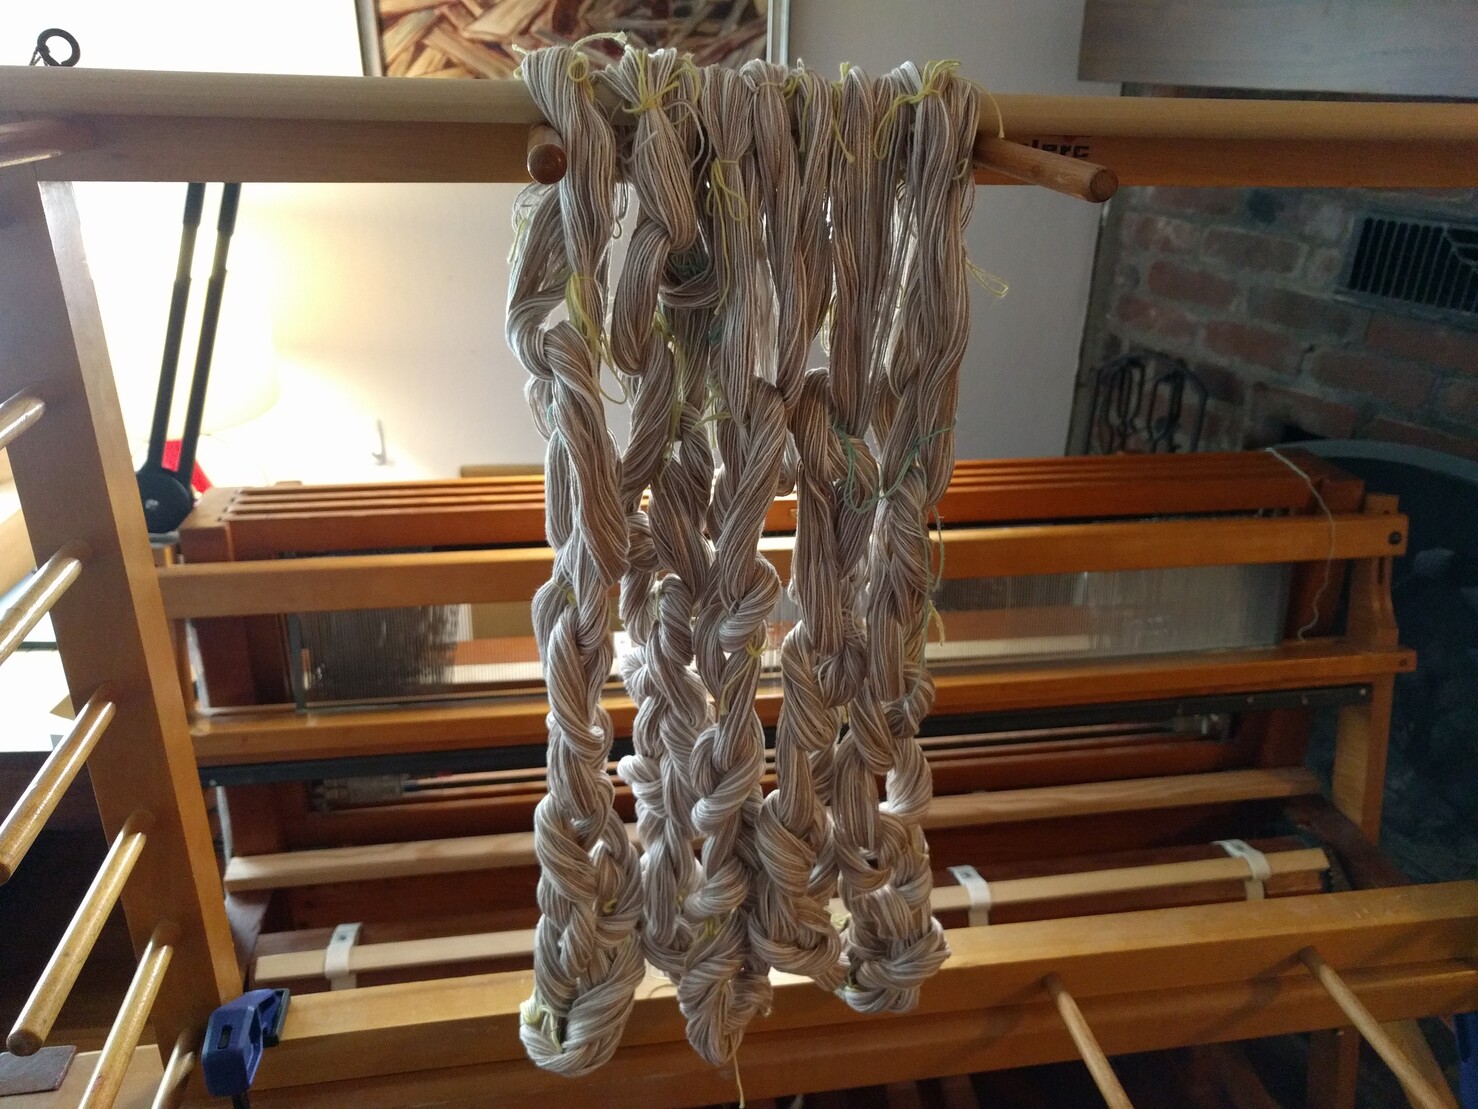
Just finished measuring out 600 2.5yd warp threads for my next project: a pair of hand towels woven with a doubleweave overshot pattern. In my enthusiasm I actually overshot (pun always intended) the thread count. I originally only needed 540 threads (16.75" wide towels), but now I'm just going to extend the warp to be 18" wide (576 threads) and have wider towels.
Why not use all 600 threads? My overshot pattern repeats at 18 and I don't want to figure out how to divide it. #weaving
The latest edition to my office is a vintage Warmink wall clock from the 1960s I got as a gift. Unlike the vintage alarm clock I tried in my office before, this has a quiet and slow tick, and a pleasant chime on the hour and half hour. Plus it tracks moon phases!
I will likely be spending the next few weeks adjusting the pendulum and minute hand so it keeps perfect time. #vintage #clocks
Beer Update: It's alive! The first few days the beer was perfectly still with no sign of life (the yeast were reproducing), but now a week in you can see bubbles on the top and the airlock is bubbling away. This means the yeast is alive and happily converting sugars into alcohol and CO2.
This is a lager yeast so it will hang out more at the bottom of the container compared to ale yeasts. In a few weeks they will run out of food and settle to the bottom.
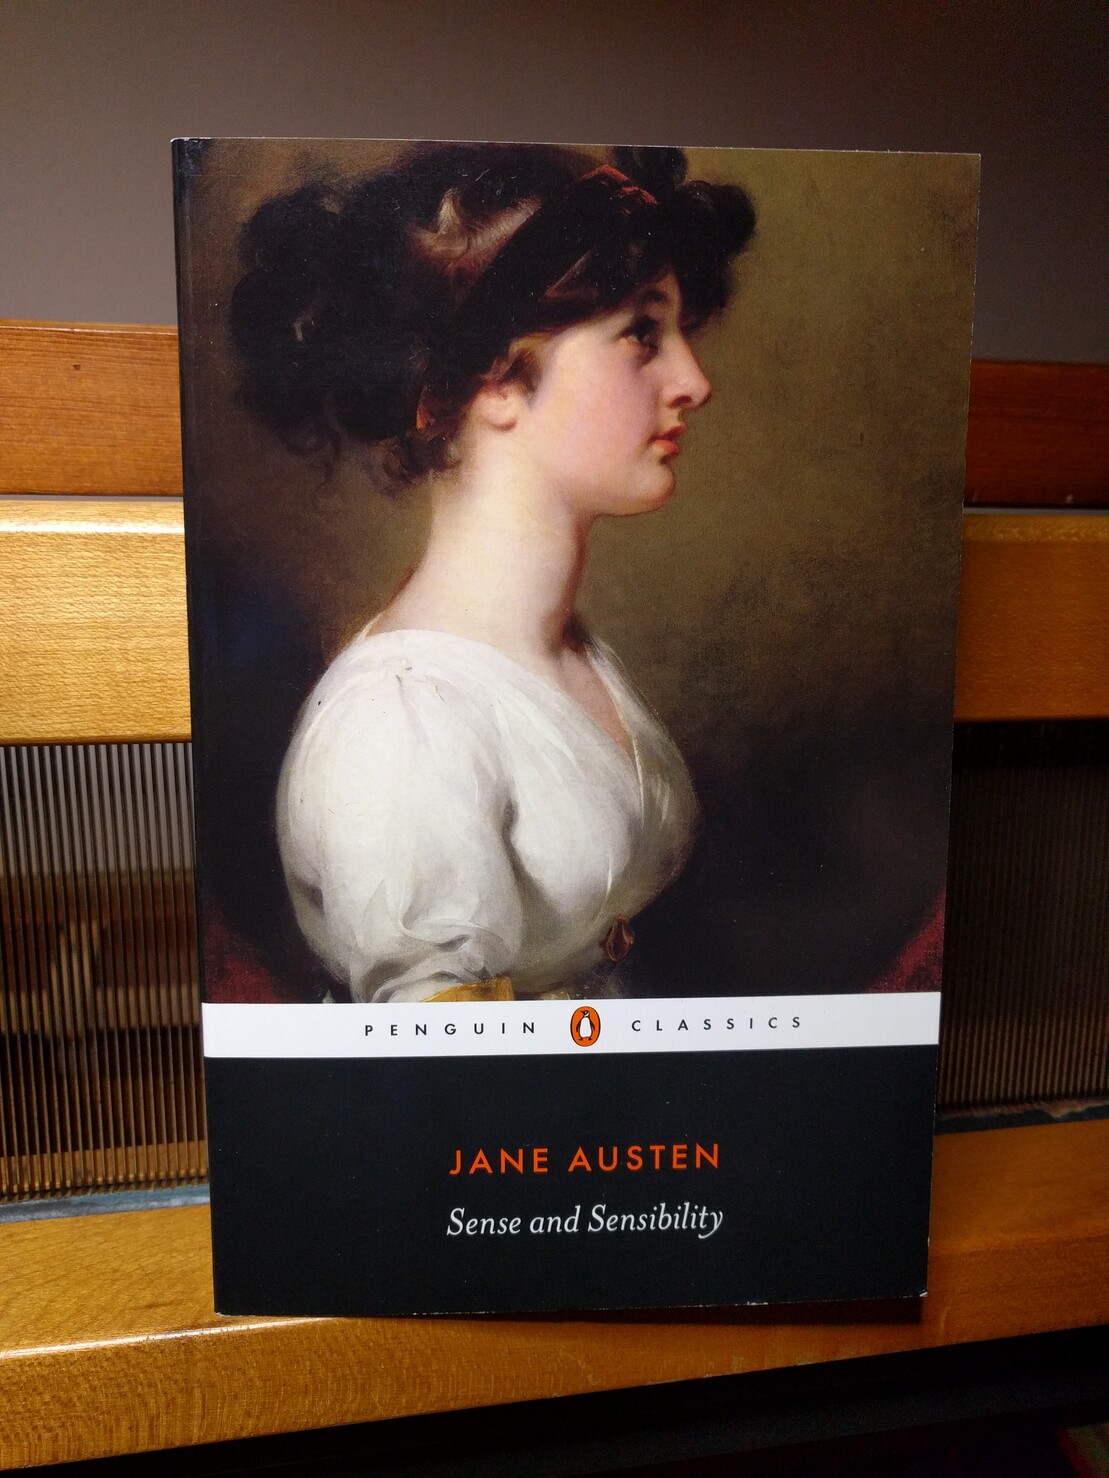
I thought it would be nice to begin the year with a little Sense and Sensibility. I haven't read this novel yet, but I really enjoyed Pride and Prejudice when I read it about two years back so I have great expectations.
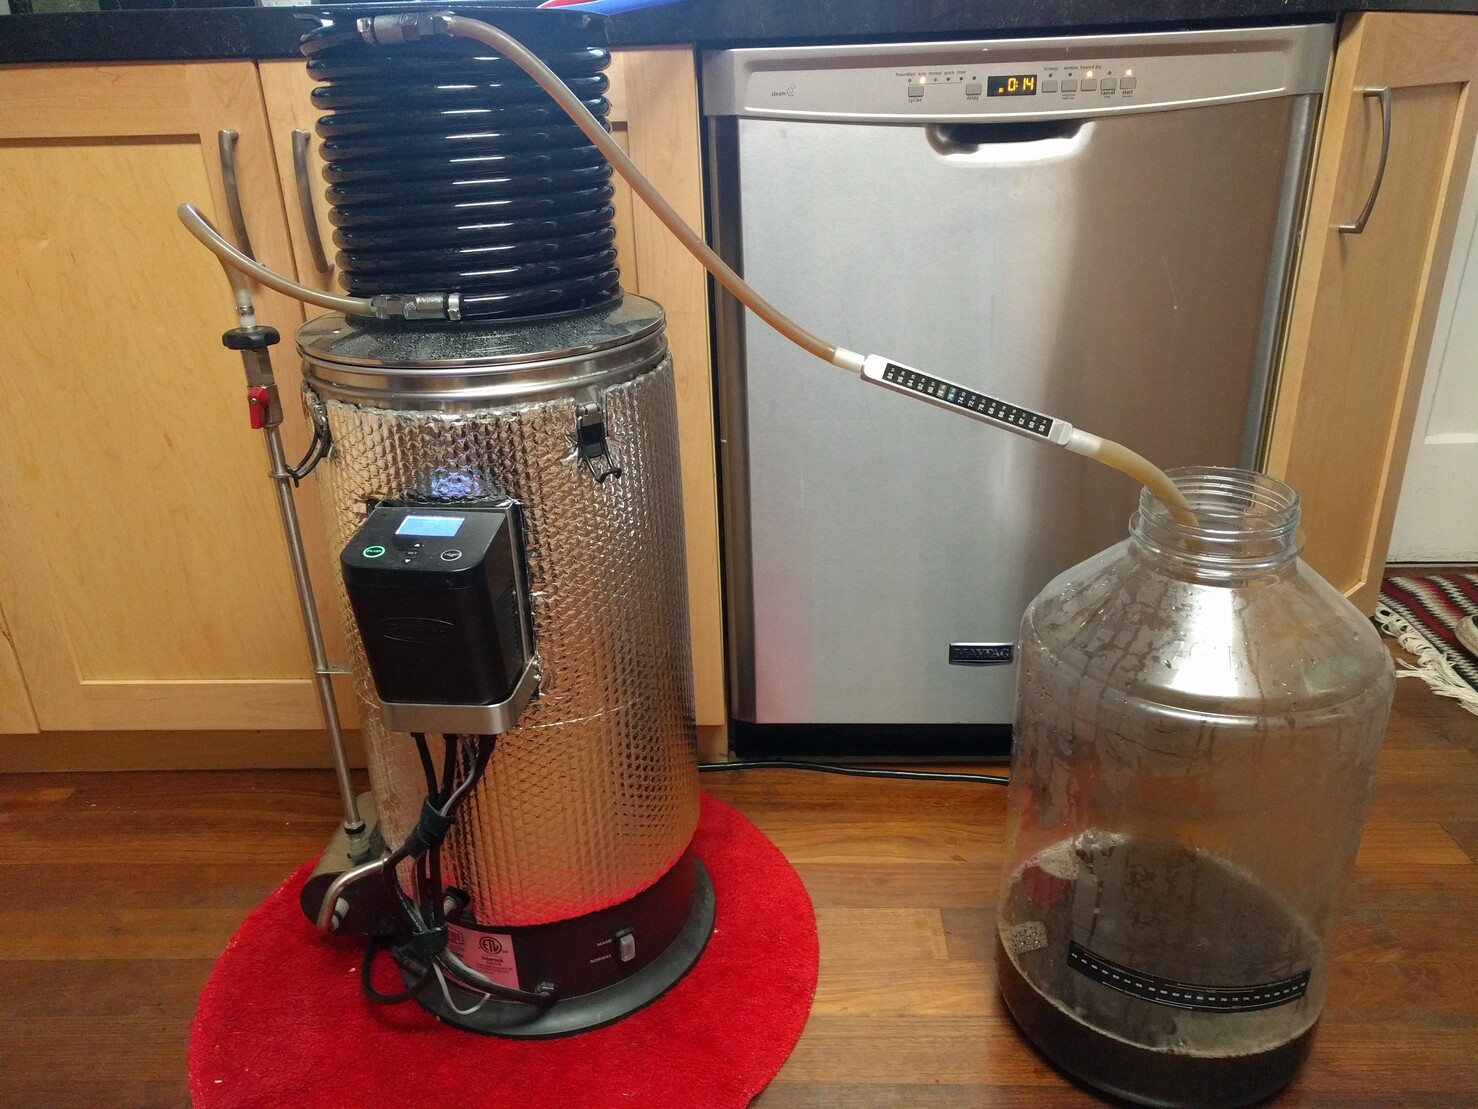
With the last bit of wort pumped into the carboy, I pitch my yeast, add an airlock to the top, fill it with vodka, and the brewing process is done. I will move the carboy to a temperature-controlled chamber where it will ferment for a few weeks, then lager for a few more weeks, before I transfer it to a keg.
As the wort pumps into the carboy, I redirect a bit into a cylinder so I can take a gravity measurement (in this case I was right on target: 1.050!). This measures the specific gravity of the liquid compared to plain water and approximates the amount of sugar you have in your wort. Later when the beer is done fermenting I will take another reading and use the difference to determine how much sugar was converted into alcohol.
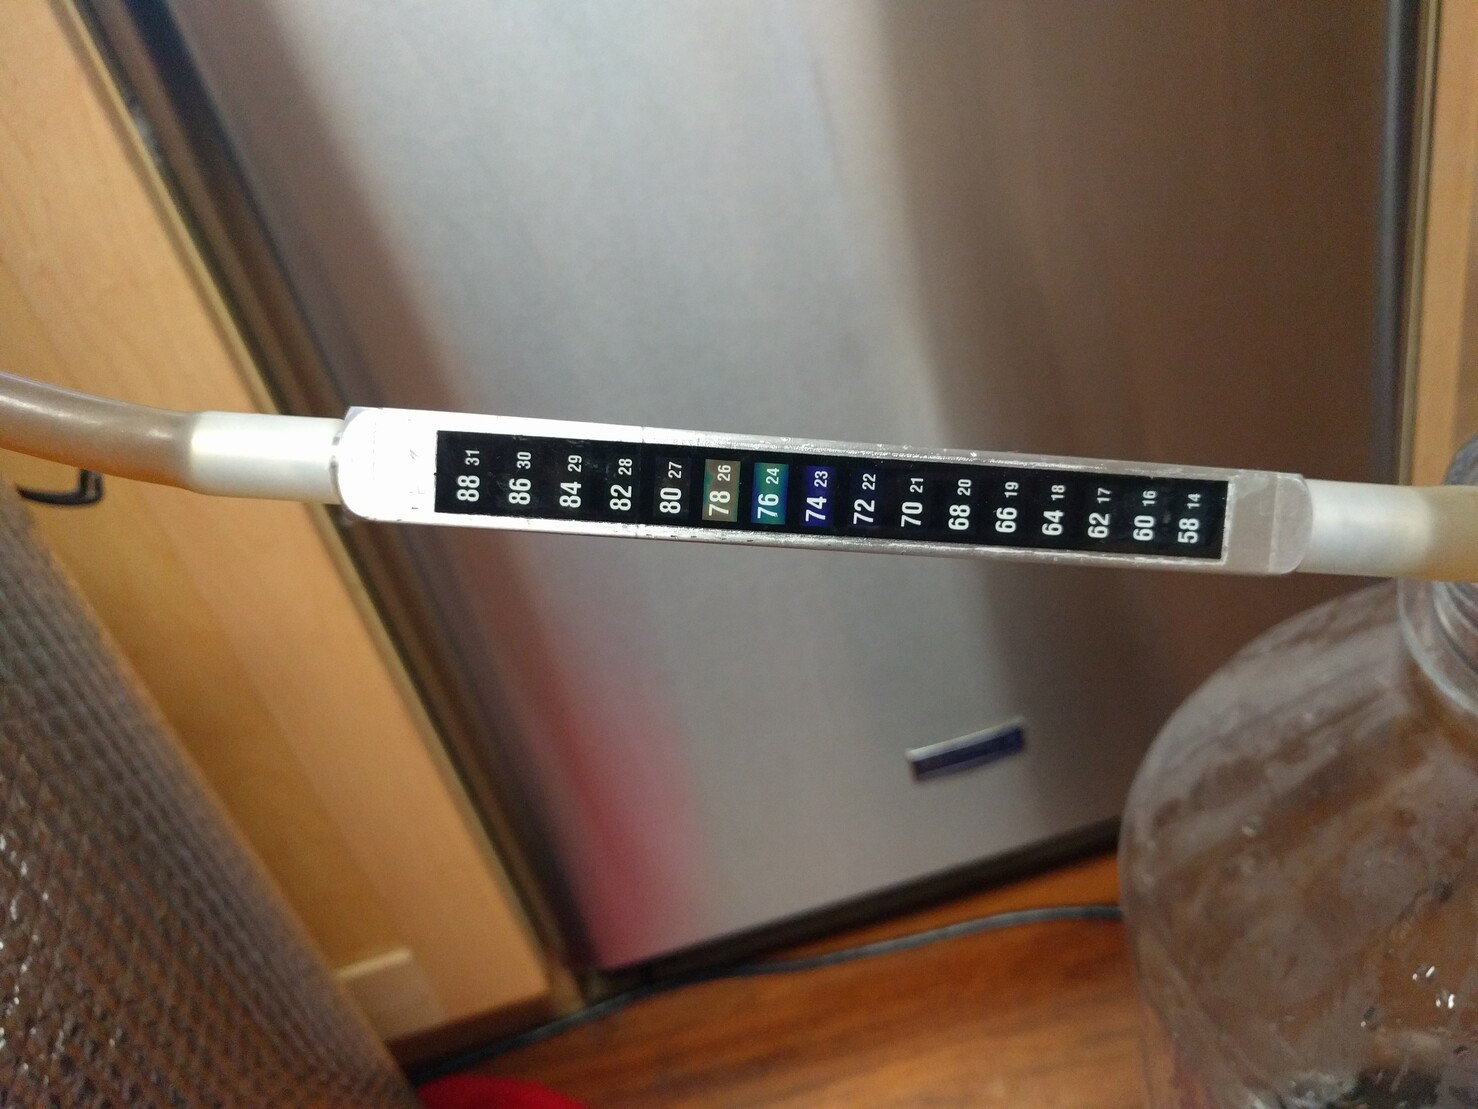
With enough cool water flowing through the system, the counterflow chiller can chill the wort enough to go into the fermentation vessel (plastic carboy) within a few minutes. I have an in-line thermometer I use to monitor the temperature of the wort leaving the counterflow chiller and when it's within the right range I stop the pump, move the wort output to my carboy, and start the pump again, pumping the cool wort into the carboy.
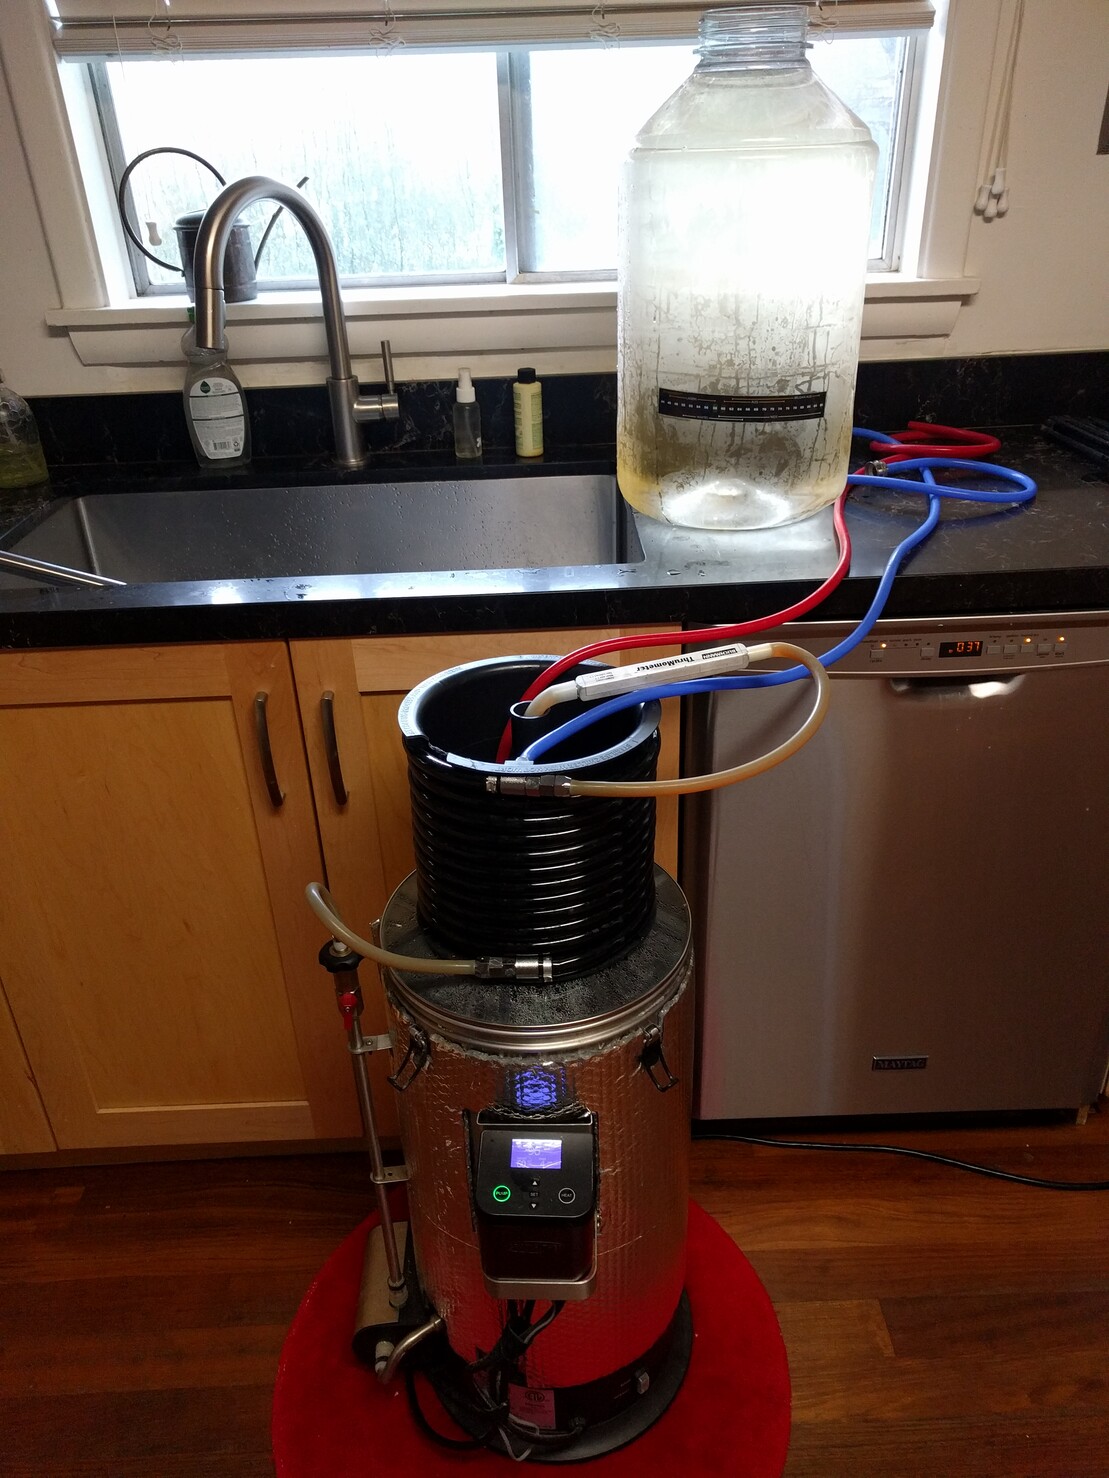
The boil is done so I've attached my counterflow chiller to my Grainfather pump and I'm recirculating boiling wort through it for 10 minutes to sanitize the inside of it before I connect it to cool water to actually chill the wort. I also filled my fermentation vessel with sanitizing solution for 10 minutes so it will be disinfected when I'm ready to transfer wort to it.
Now for the first (and for this recipe only) hop addition with 60 minutes left in the boil. These are whole leaf Cascade hops that we harvested from our hop plant in our garden this summer.
Adding hops at this stage of the boil extracts compounds that make the beer taste more bitter. These compounds are also anti-microbial and help protect the beer from infection post-boil, especially in the sensitive stage before the yeast make any alcohol.
- Personal Site
- https://kylerank.in
- Personal Bibliography
- https://kylerank.in/writing.html
Admin
Technical author, FOSS advocate, public speaker, Linux security & infrastructure geek, author of The Best of Hack and /: Linux Admin Crash Course, Linux Hardening in Hostile Networks and many other books, ex-Linux Journal columnist.
Joined Apr 2019